Monday, 30 May 2016

Where the hell have you been?

Well, there’s a couple of answers to that — firstly I wasn’t very well for a while (I’m OK now, nothing to worry about), but secondly I’ve been painting like crazy.


A while back we started doing Fantasy Warriors at the local club, about which I’ve previously blogged. I’ve always had an ambition to have a ratman army. (Yes, I own a copy of that White Dwarf issue!). So this seemed an opportunity to go build one, in all it’s squeakyness.


Now the problem here is that ratty troops aren’t very good, so you get a LOT of them. I started out with the intention of having an army with no exotic things in it, but that plan fell apart when I started looking at how many figures I’d need…


As the vast Green River wends its way to the sea, it sprawls out across a long valley. Shallow and slow, its waters fill with weeds which provided the original food source behind the rats’ establishment there. Behind the valley are hills rich with metals, whose extraction can be funded by the easy food gathered from the flood plains. The rats of the Green River can afford to breed and arm huge armies...


OK, first off, I’d need some big blocks of troops. These can soak up archery and although they’ll get battered in combat, they need vast numbers of casualties before hitting their breaking points. They get banners and drums to bolster them a bit.
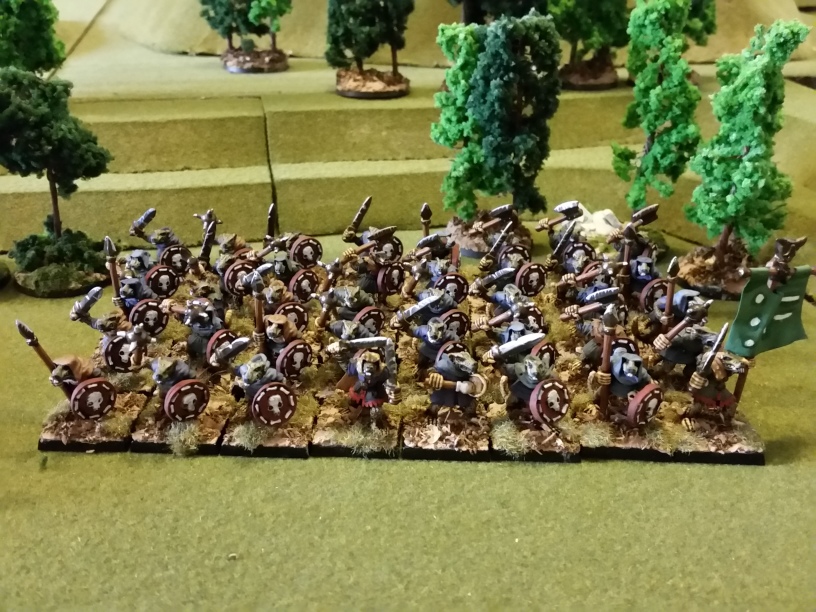


The first batch of 40 slaves are from the alluvial floodplains. Their clothing is dyed blue from the woad which grows plentifully in the area.


The second unit of 40 slaves are from the mining tribes. Their clothing is coloured by the waste ores and hence they’re in tones of brown and yellow — they also carry the green flag of their alliance. The majority of these figures are Black Tree. Not all of these figures are rats — for some variety there are fishmen (from CP Models) and also dwarf slaves and convicts (from Midlam).
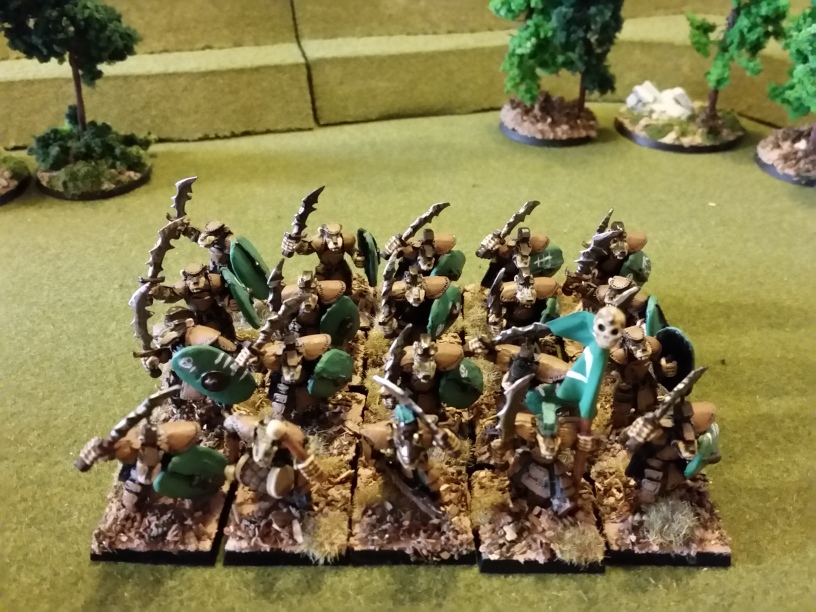


Next up, some tougher units. Leather armoured fighting rats; the bright green shields & banner tie them into the army theme. Black Tree figures again. They’ve been in battle before and have kill marks and victory skulls on their shields to show for it.
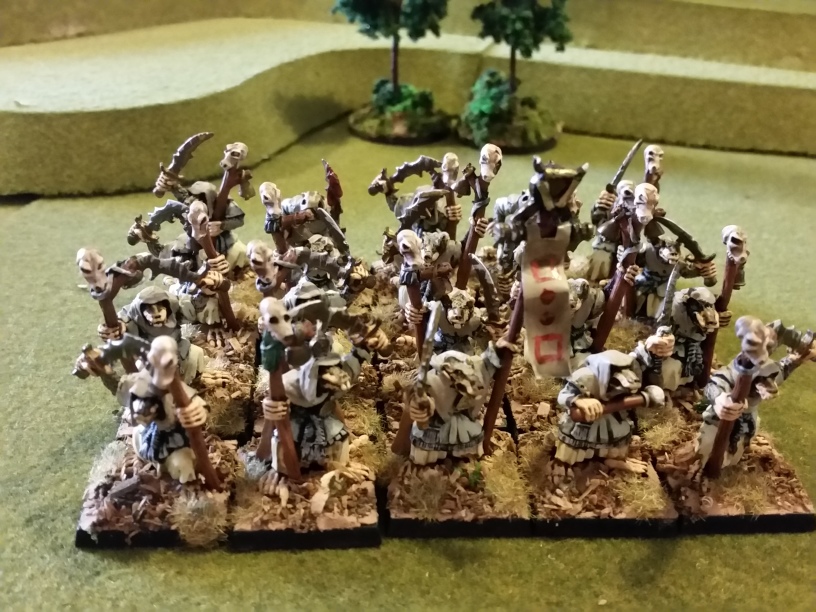


Elite warrior monks. FW doesn’t have a unit type as such for these guys, but I like the figures so I had to have a unit — they’re wearing lighter coloured clothing to signify their status as monks.


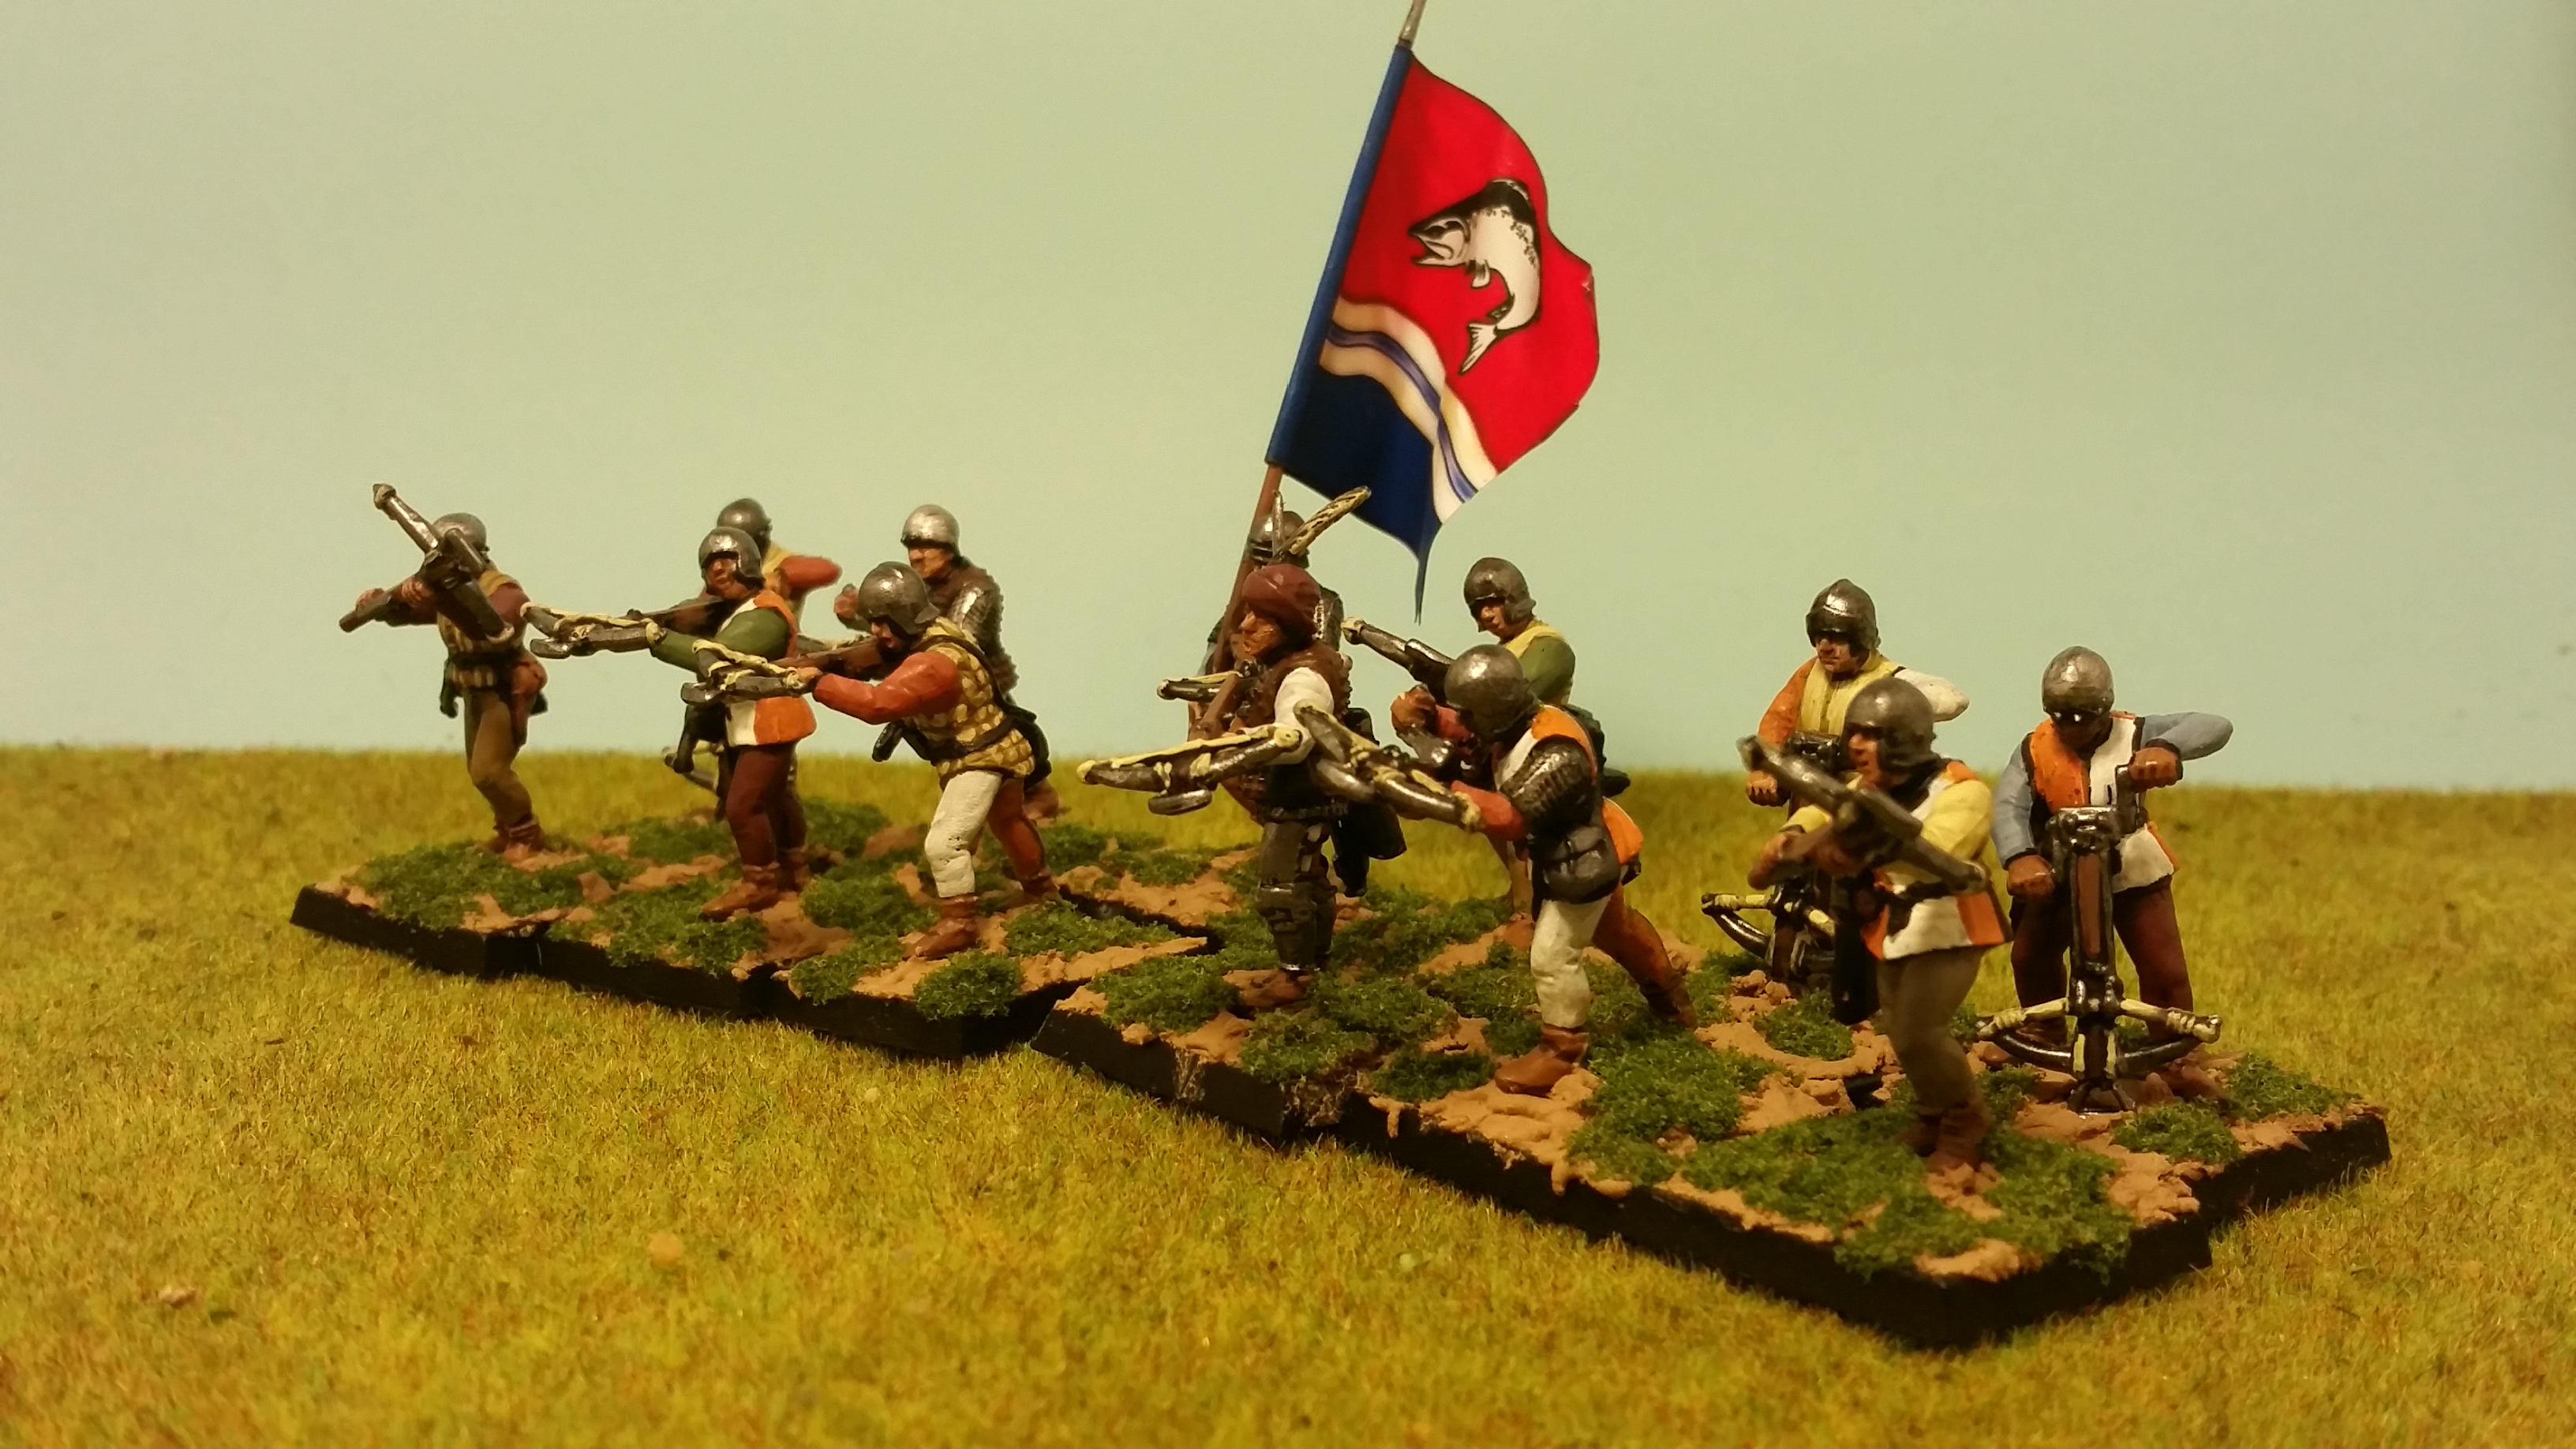
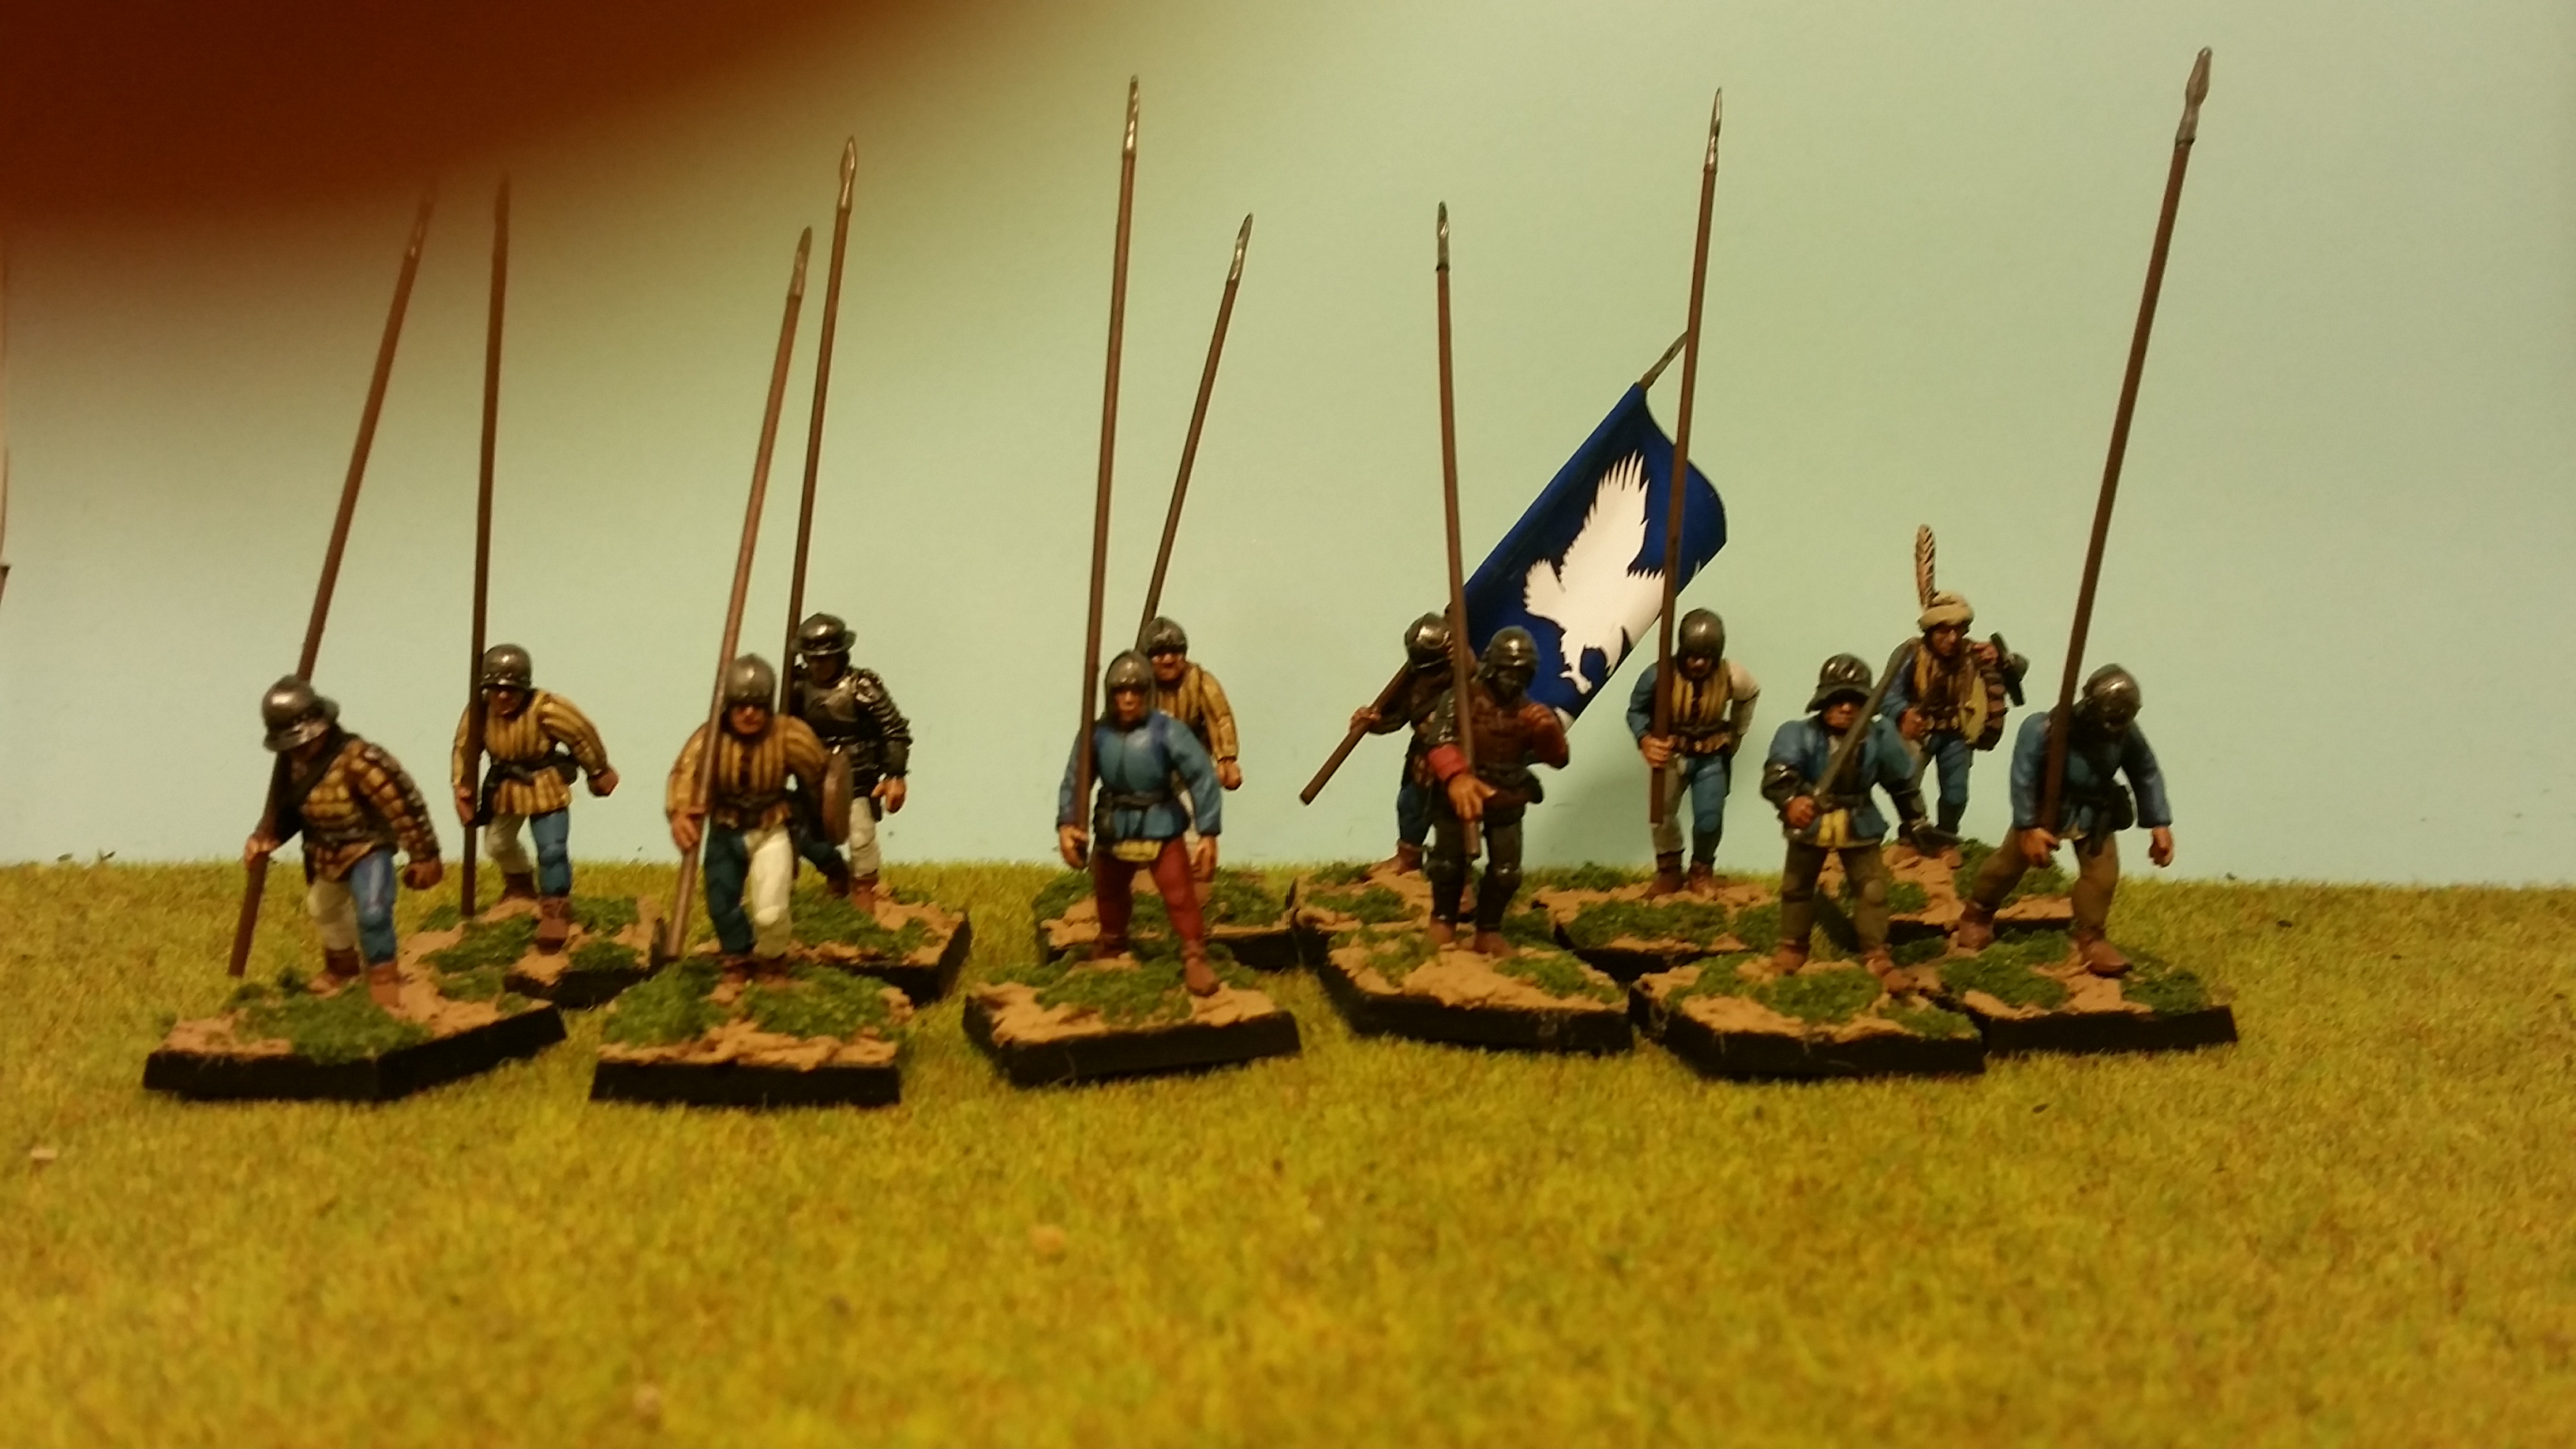
And the last of the main units are pike-and-crossbow elite guards. This unit is a little more ragtag — or “experienced” as we prefer to call it made up of various Black Tree figures. They’re accompanied by one of the battleleaders (Reaper)


Next up was the hardest unit to assemble...
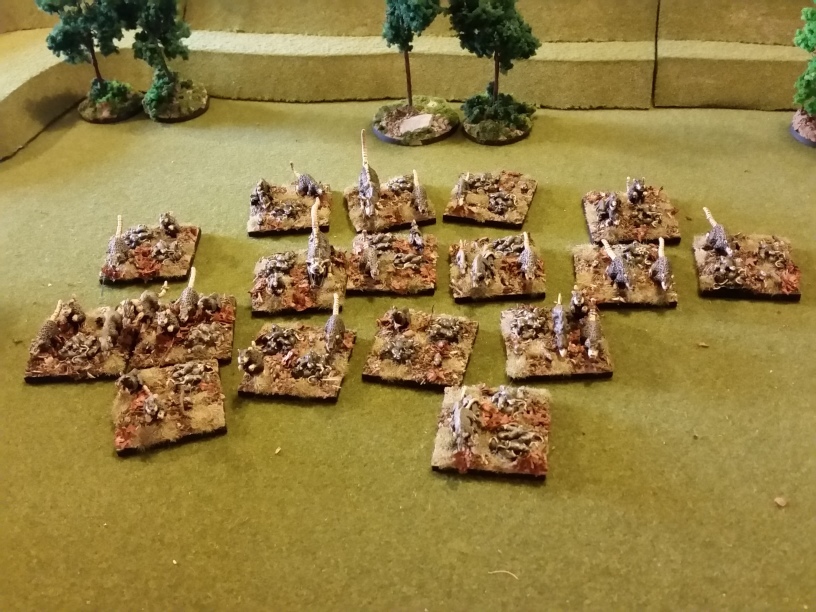


Rat swarms. Rat armies in FW can buy these for silly cheap; they’re basically fire-and-forget attack units. I wanted some variety in there since there’s a lot of bases and that’s why it got complicated. I bought giant rats from Reaper, from the Reaper Bones range. There are GW chaos mutant rats in there, Black Tree’s large rats and (to fill in the spaces), the teeny-tiny individual rats produced by Warbases (on whose 40mm squares they all sit).
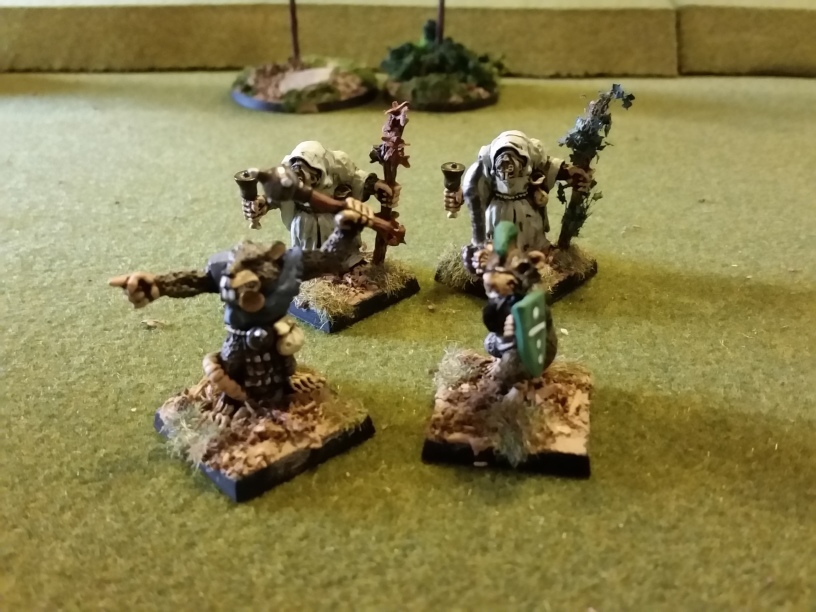
Warchief, a battleleader and two soothsayers — the Seer of the Autumn (on the left) and the Seer of the Summer.

This a messenger (a Bones figure with a scroll on his backpack), three scouts (2 Reaper metals and a Black Tree figure) and a hero and destroyer hero (both from Black Tree). The scouts I’d hoped to get me control of the battlefield, but even with their support my lousy dice rolls meant the first outing was against Elves on ground of their choosing.

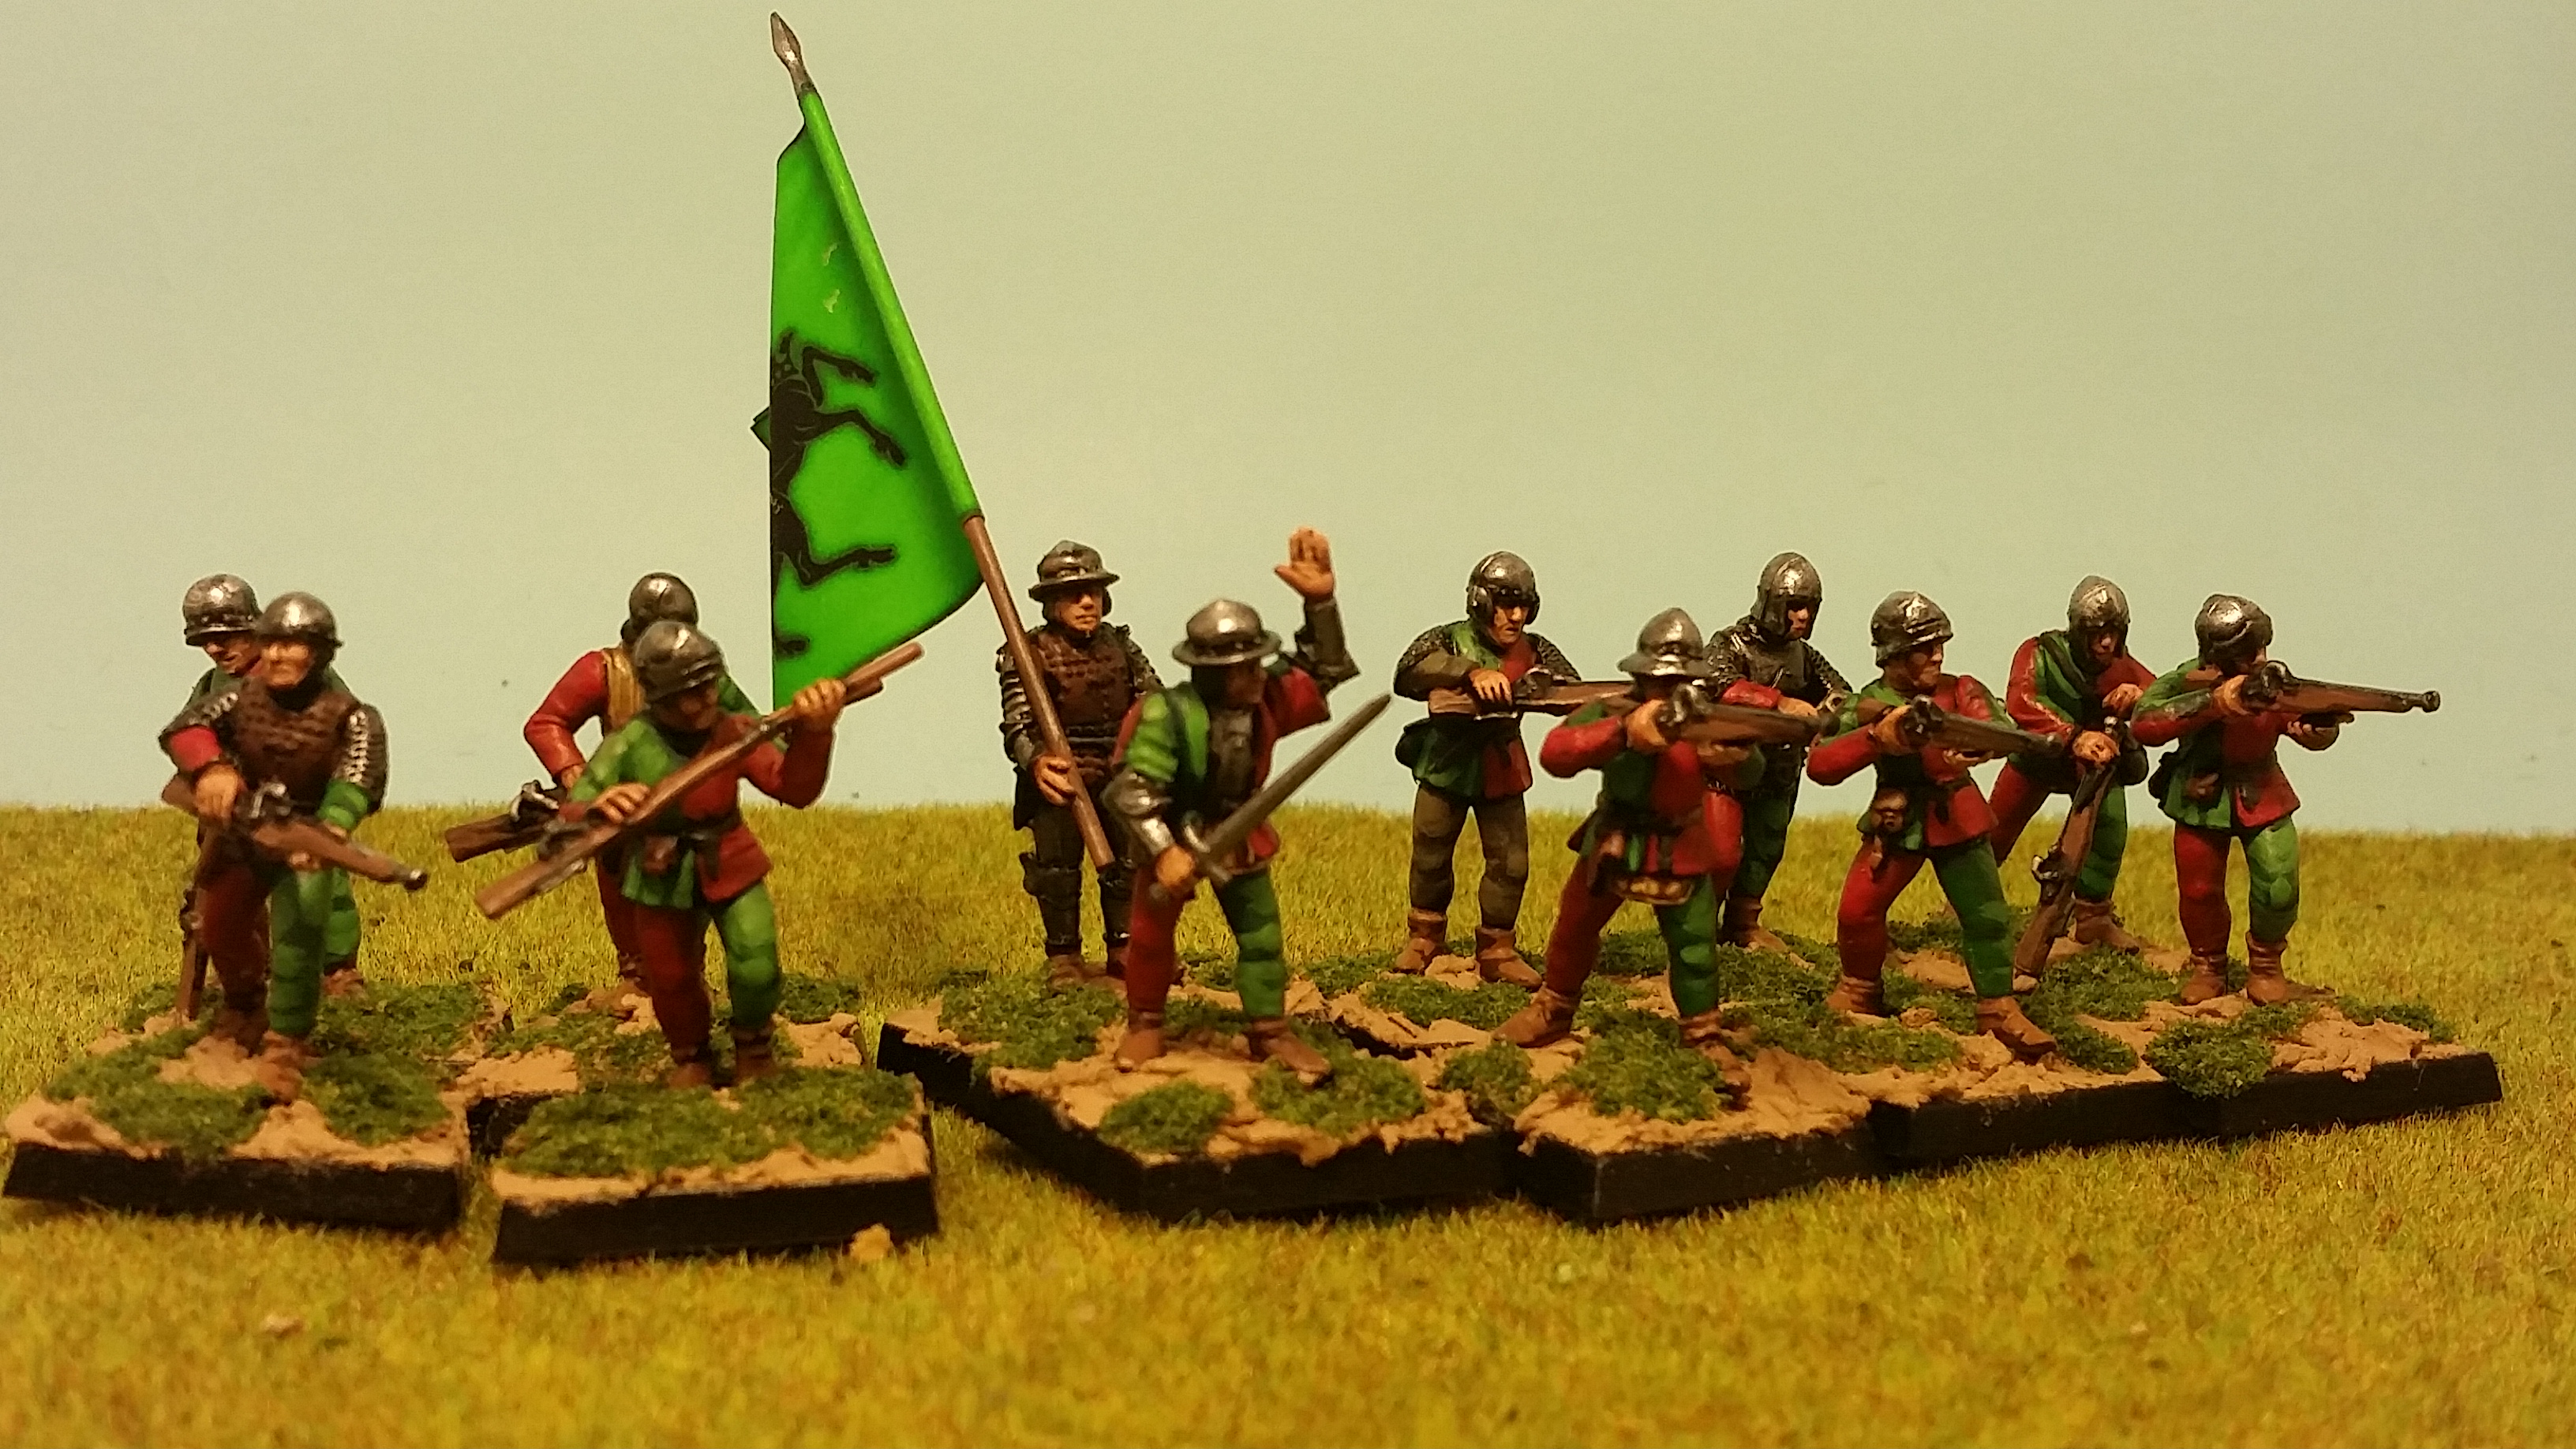
Guns! FW doesn’t have any 2-part Jezzail units, so I cut these Black Tree figures off their tabs and rebased them onto single 25mm squares. The leader and banner are Bob Charrette’s Ratmen figures. These particular ones were part of boxed set bought in the 1990s when the Virgin Megastore in Birmingham were selling off their wargames stock…

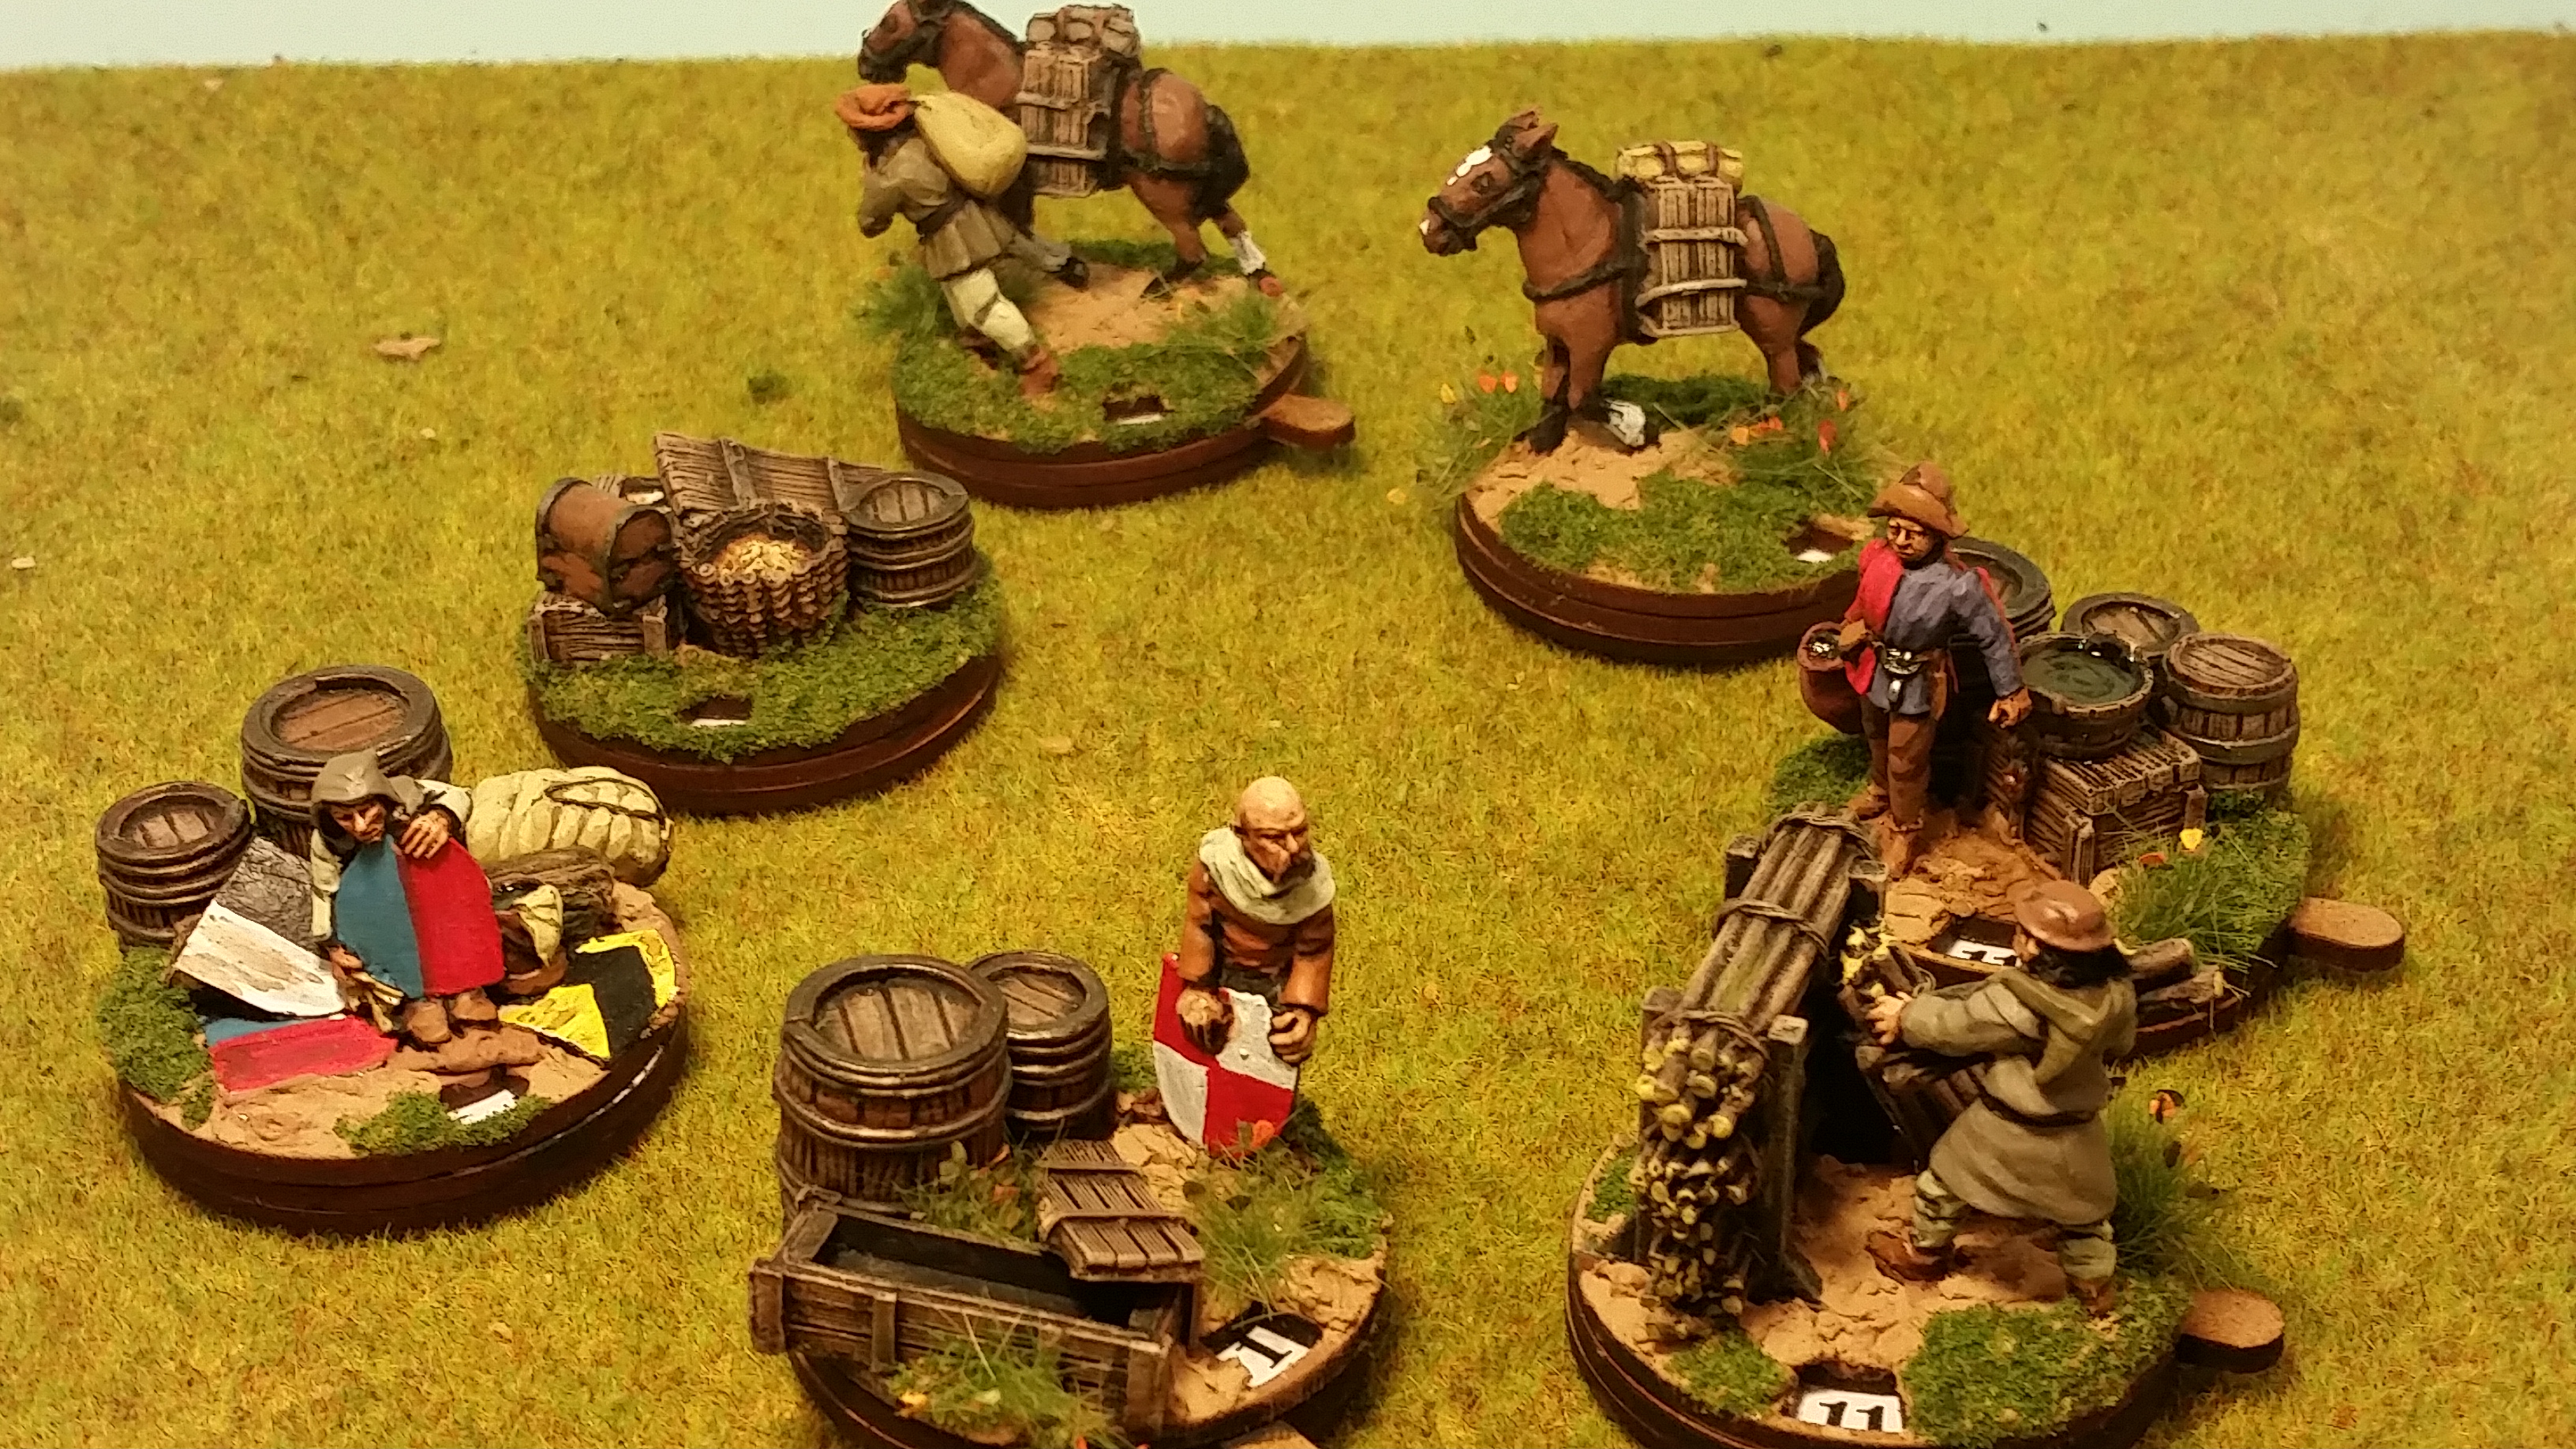
Shooting units need ammunition counters; once again these are Warbases 40mm casualty markers with a diorama on top.
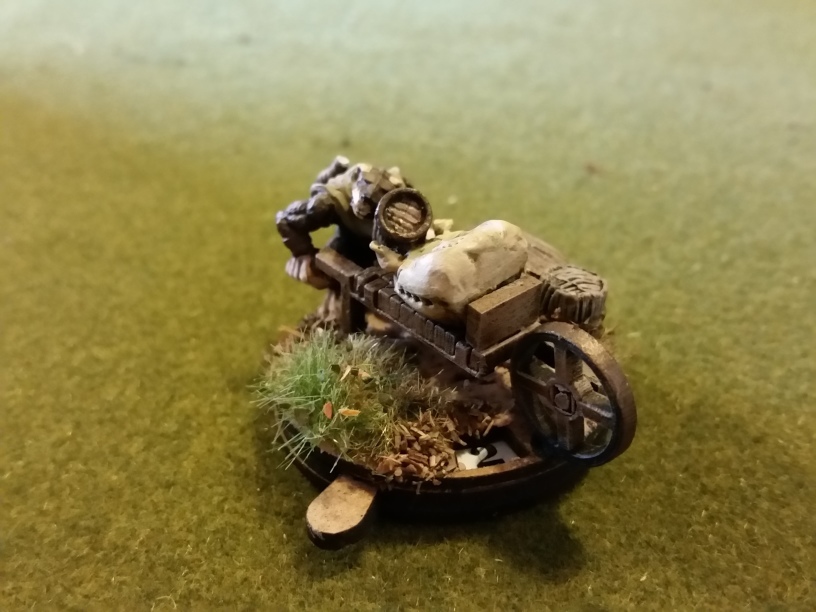
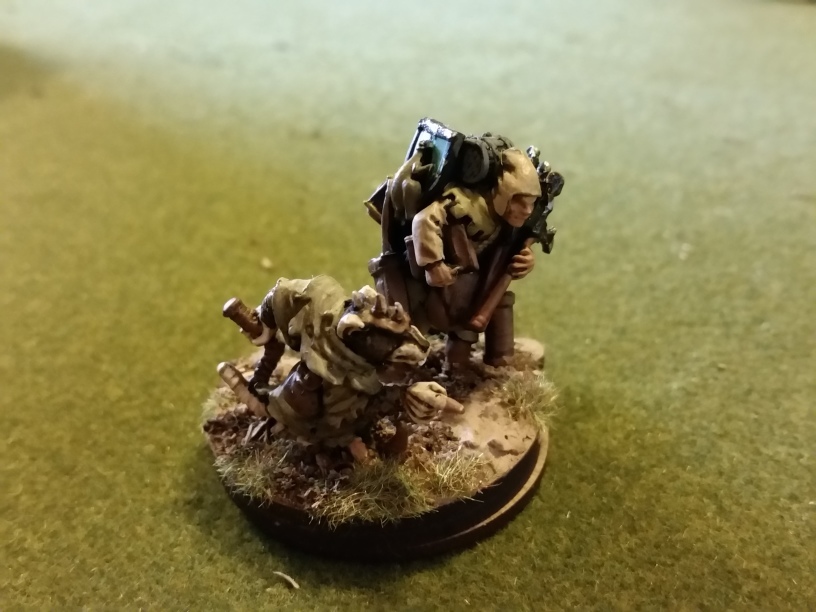
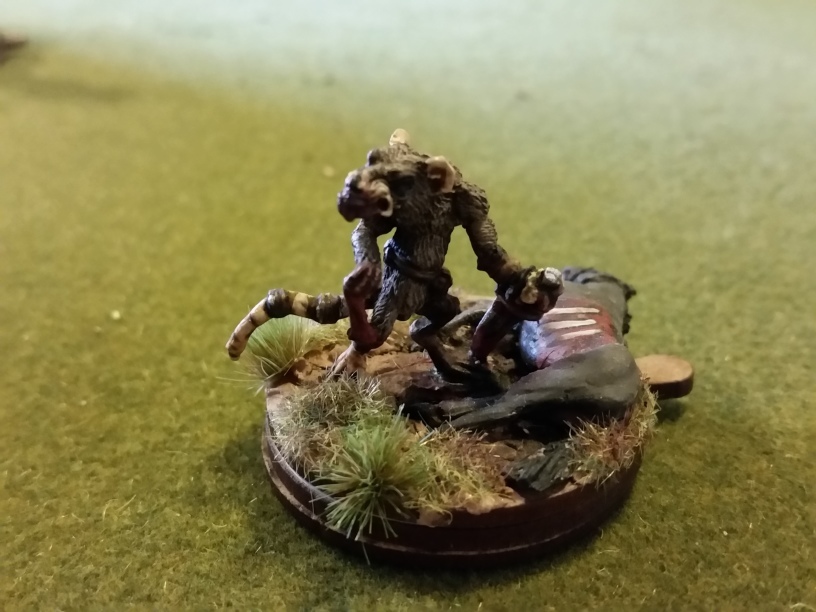
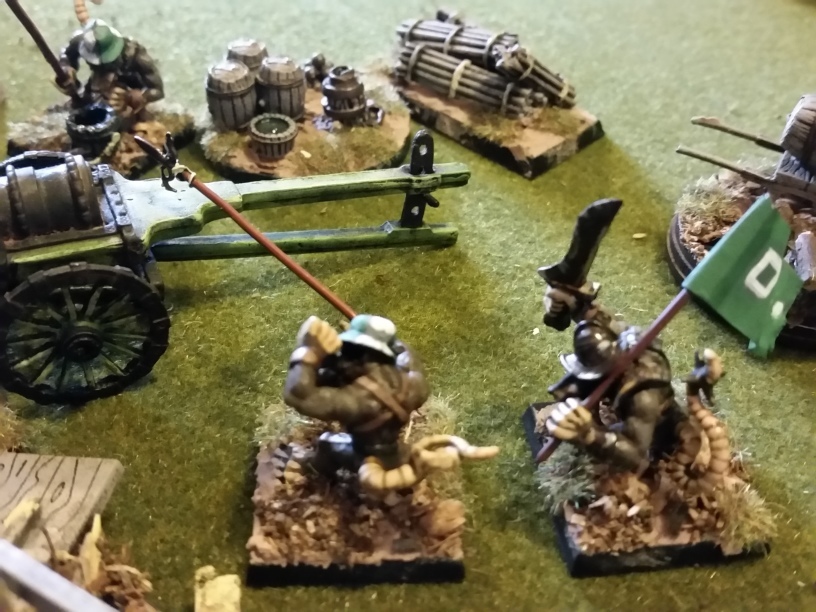
A rat delivering stuff on a barrow (GW figure, Warbases barrow and, I think, Alternative goods), the next is a whip-wielding Black Tree rat ordering a encumbered human to carry stuff about (Reaper’s “Compleat Adventurer’). Finally a Reaper rat is cutting up a Warlord dead horse for supplies.

Next up, we need some ranged power.. A proper gun!
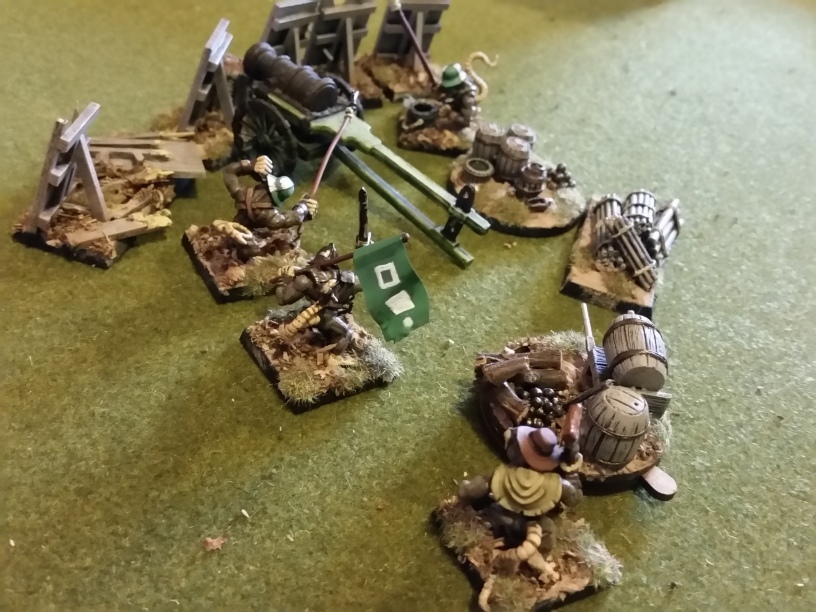


GW figures which were customised with all sorts of bits; there’s Battle Forge parts in there and loads of Warbases products including and ammunition counter. Hats came from Warlord’s historical lines, the gun is from Redoubt and the gun tools are ages old Bicorne.

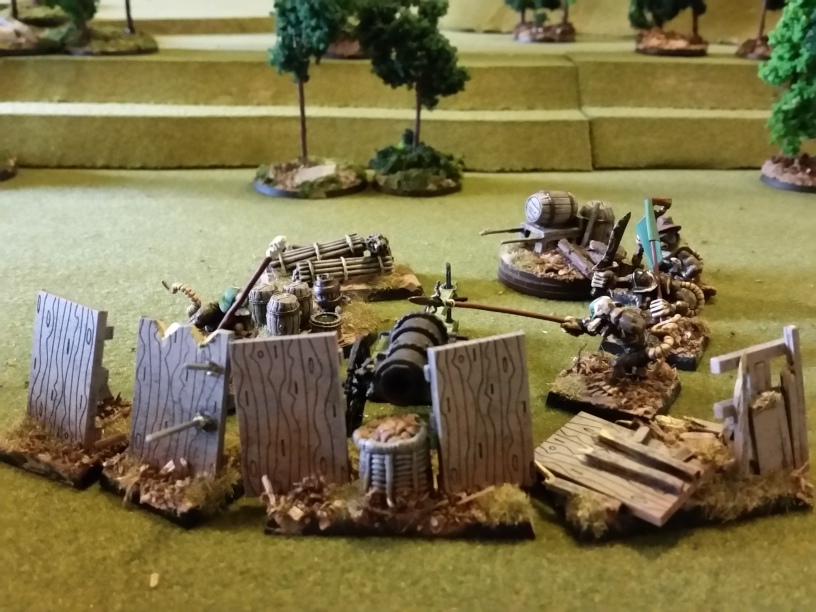
And from the wrong end, it looks like this!

The final piece is a giant worm. I was a little worried about this — it’s expensive, getting it to appear is a random event and it felt a bit unpredictable. But it adds some variety to the army and it’s something apart from another-unit-of-rats-with-spears.
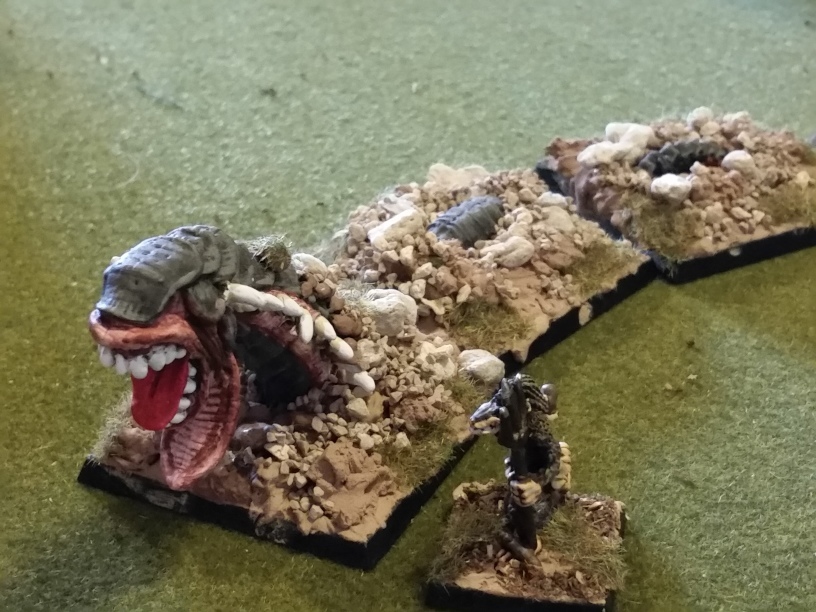

This also took some assembling.. the soothsayer to summon it is obviously another Black Tree swarmmaster figure. The worm itself was complicated… The front comes from a Reaper miniature… but it’s not very long and the FW rules specify the worm takes up 15cm. So I went digging in the bits box; a while back I Ebay-purchased a pile of Kryomek figures which included (amongst the wanted figures) a Warmaster that someone had, for some reason, cut up. Well, because I’m a hoarder, I kept the bits… and, with a bit of modelling, they make up the back sections of the worm. Lots of wood filler and Woodland Scenics ballast as stones and the worm is burrowing through the terrain.


In the end it turned to be both effective in battle (eating a total of two cavalry units), taking a lot of punishment (turns out that being a land-burrowing worm gives you a tough hide) and also completely terrifying to the Elves. Who ran away when it showed up!

Thursday, 24 September 2015

Fantasy Warriors Time Dial

Fantasy Warriors is one of the few games that makes extensive use of time in the game. The day is divided into 12 periods and not only does the daylight or night darkness matter (affecting the soldiers abilities), but also at dawn, ghosts disappear and there are other time triggered effects.

The original game came with a cardboard dial and an hourglass to move around on it, but since I'm replacing things like the ammunition tracking with nice tokens, why not the time dial?

Warbases very nicely cut me out a double-sized version of their casualty counter to use as a starter. I wrote up some PostScript to generate a suitable disk to go in it numbered 1-6 twice. The disk got some light painting (oranges & yellow for the day and then two shades of blue for the night).

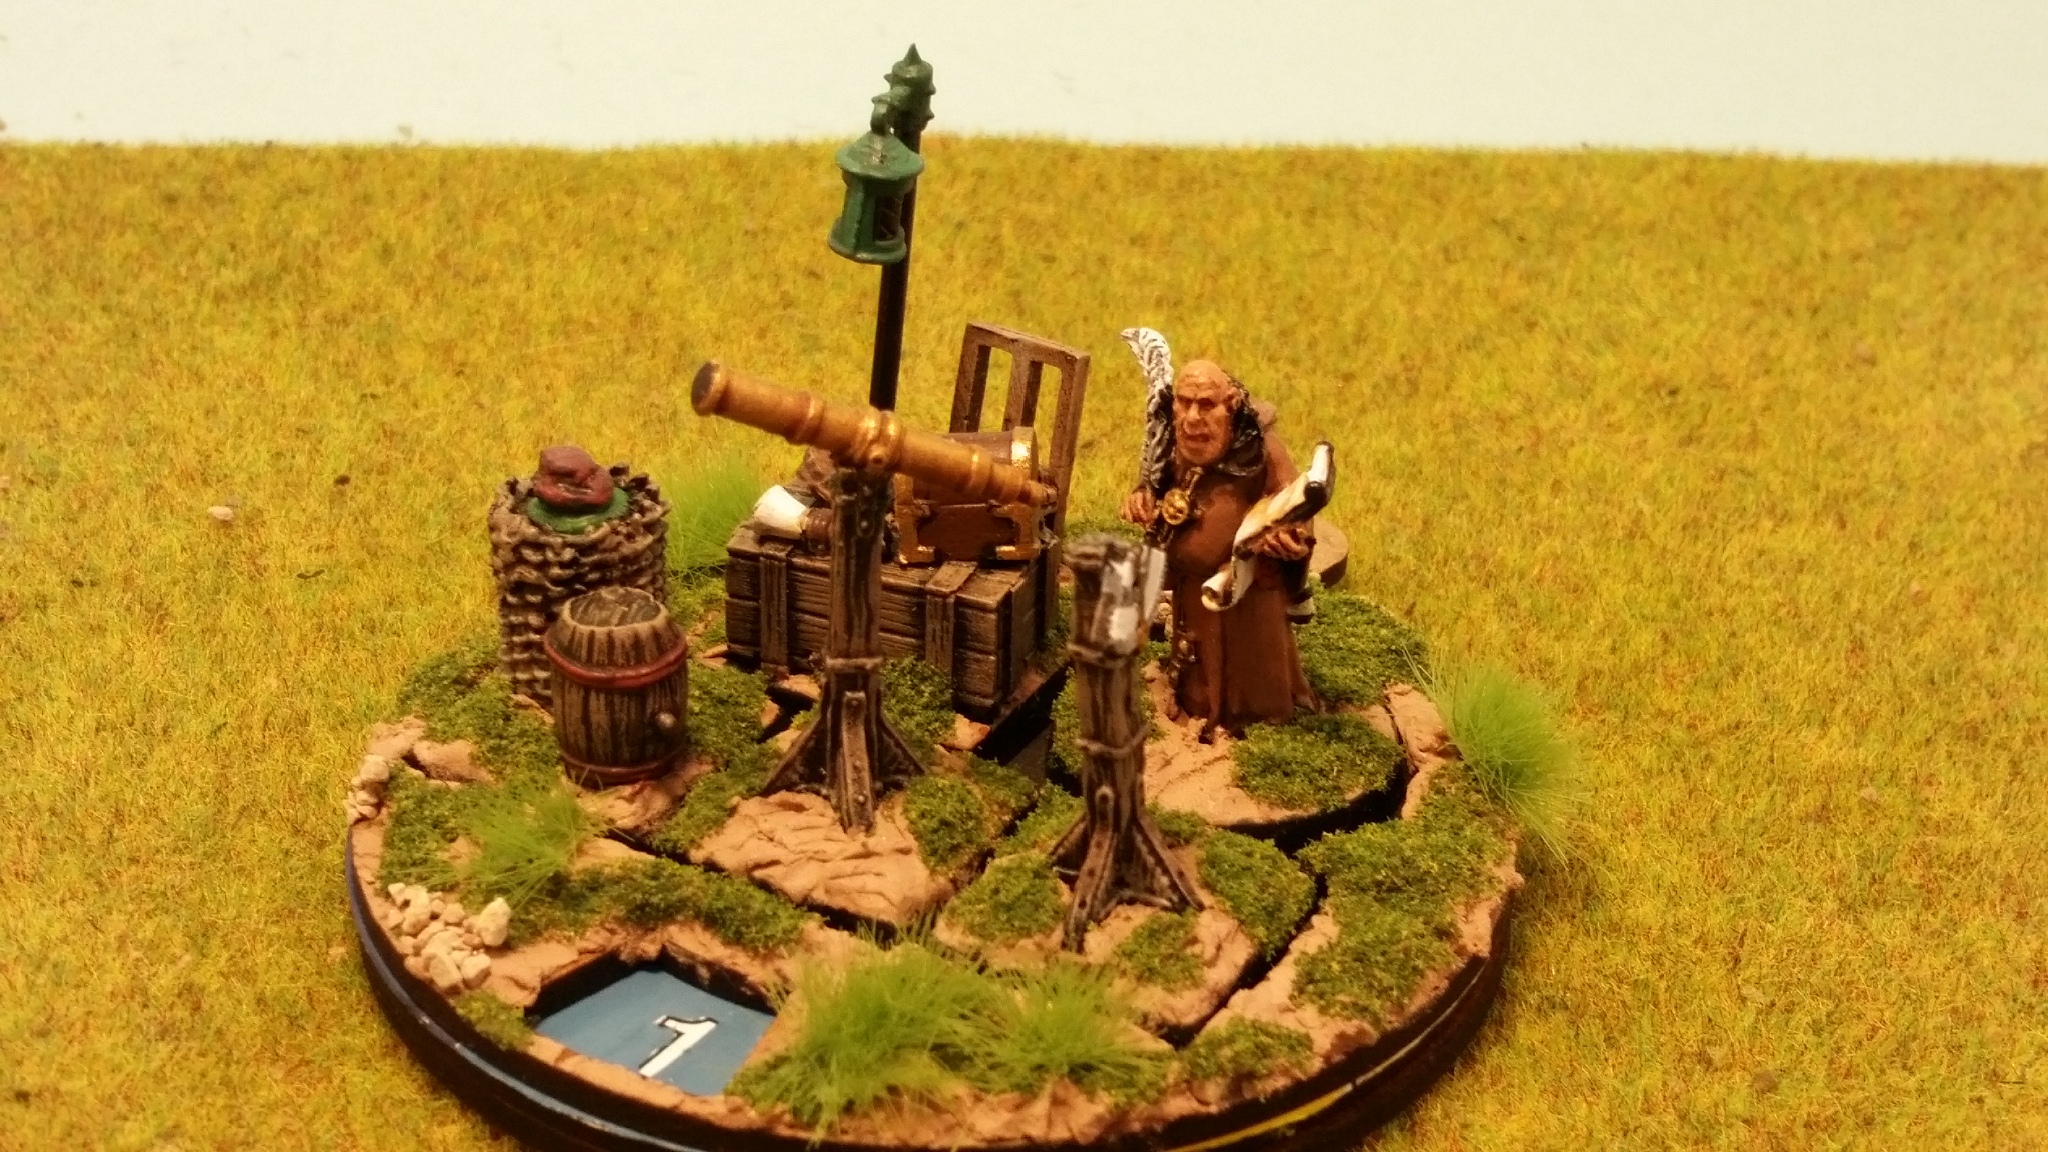
Then I needed something to put on it -- GW at one point did a monk with quill... Actually he's a techno-monk, but that was easily fixed with a scalpel trimming off tech down to just being ornamentation. The rest of his station is made of pieces from the bits box. A lantern from Mordheim, an Ainsty barrel, a telescope and theodolite from Mega Miniatures and various other bits and bobs. I've left them on smaller bases so that I have the option of using them separately or swapping them in the future for other features.

You can't see it too clearly in the picture below, but the crate is being used as a desk, with a chest, scrolls and an Alternative Armies pie on it.

The dial's basework was built up with the same B&Q filler I use for figures and Woodland Scenics scatter with tufts from Great Escape Games.

And so, instead of a boring cardboard dial, I have a monk, recording the battle for history!
Time Dial

Saturday, 21 March 2015

The Miniatures Page

After many years of membership, I've been banned from The Miniatures Page by the increasingly erratic editor.

It seems my "crimes" were;
  • To complain about the site not having a privacy policy which would protect my personal data.
  • To complain about another member threatening physical violence against me -- the other member is still posting away and appears to have been granted immunity over this because he's American and I'm not.
I'd like to take this opportunity to encourage people to use alternate sites instead;
Both these sites have the advantage of having consistent moderation, a sanity which has been missing from TMP for a while along with the refugees from TMP posting & contactable on it and also no habit of blaming and banning the victim when something does happen. I've already been using them for a while, as "katiel" and can be PMed and so on.

If you're into casual racism, misogyny, your personal data being sold off and having threats made against your life, TMP is still there. But I won't be.


Regular service is going to be resumed in a couple of days when I've recovered from going to Zurich.

Zurich, I found, is a lot like London, except that it's peaceful, clean, tidy, organised and when you look the wrong way when crossing the road (because they drive on the wrong side[1]) the traffic patiently stops instead of just running you over... I'll admit I've not been to a lot of other European cities, but Zurich & its people definitely seemed very nice. Thank you all there for looking after me.


[1]It is the wrong side. We picked a side first... :-)

Saturday, 14 February 2015

More Flintloque Painting Done!

Goblin House
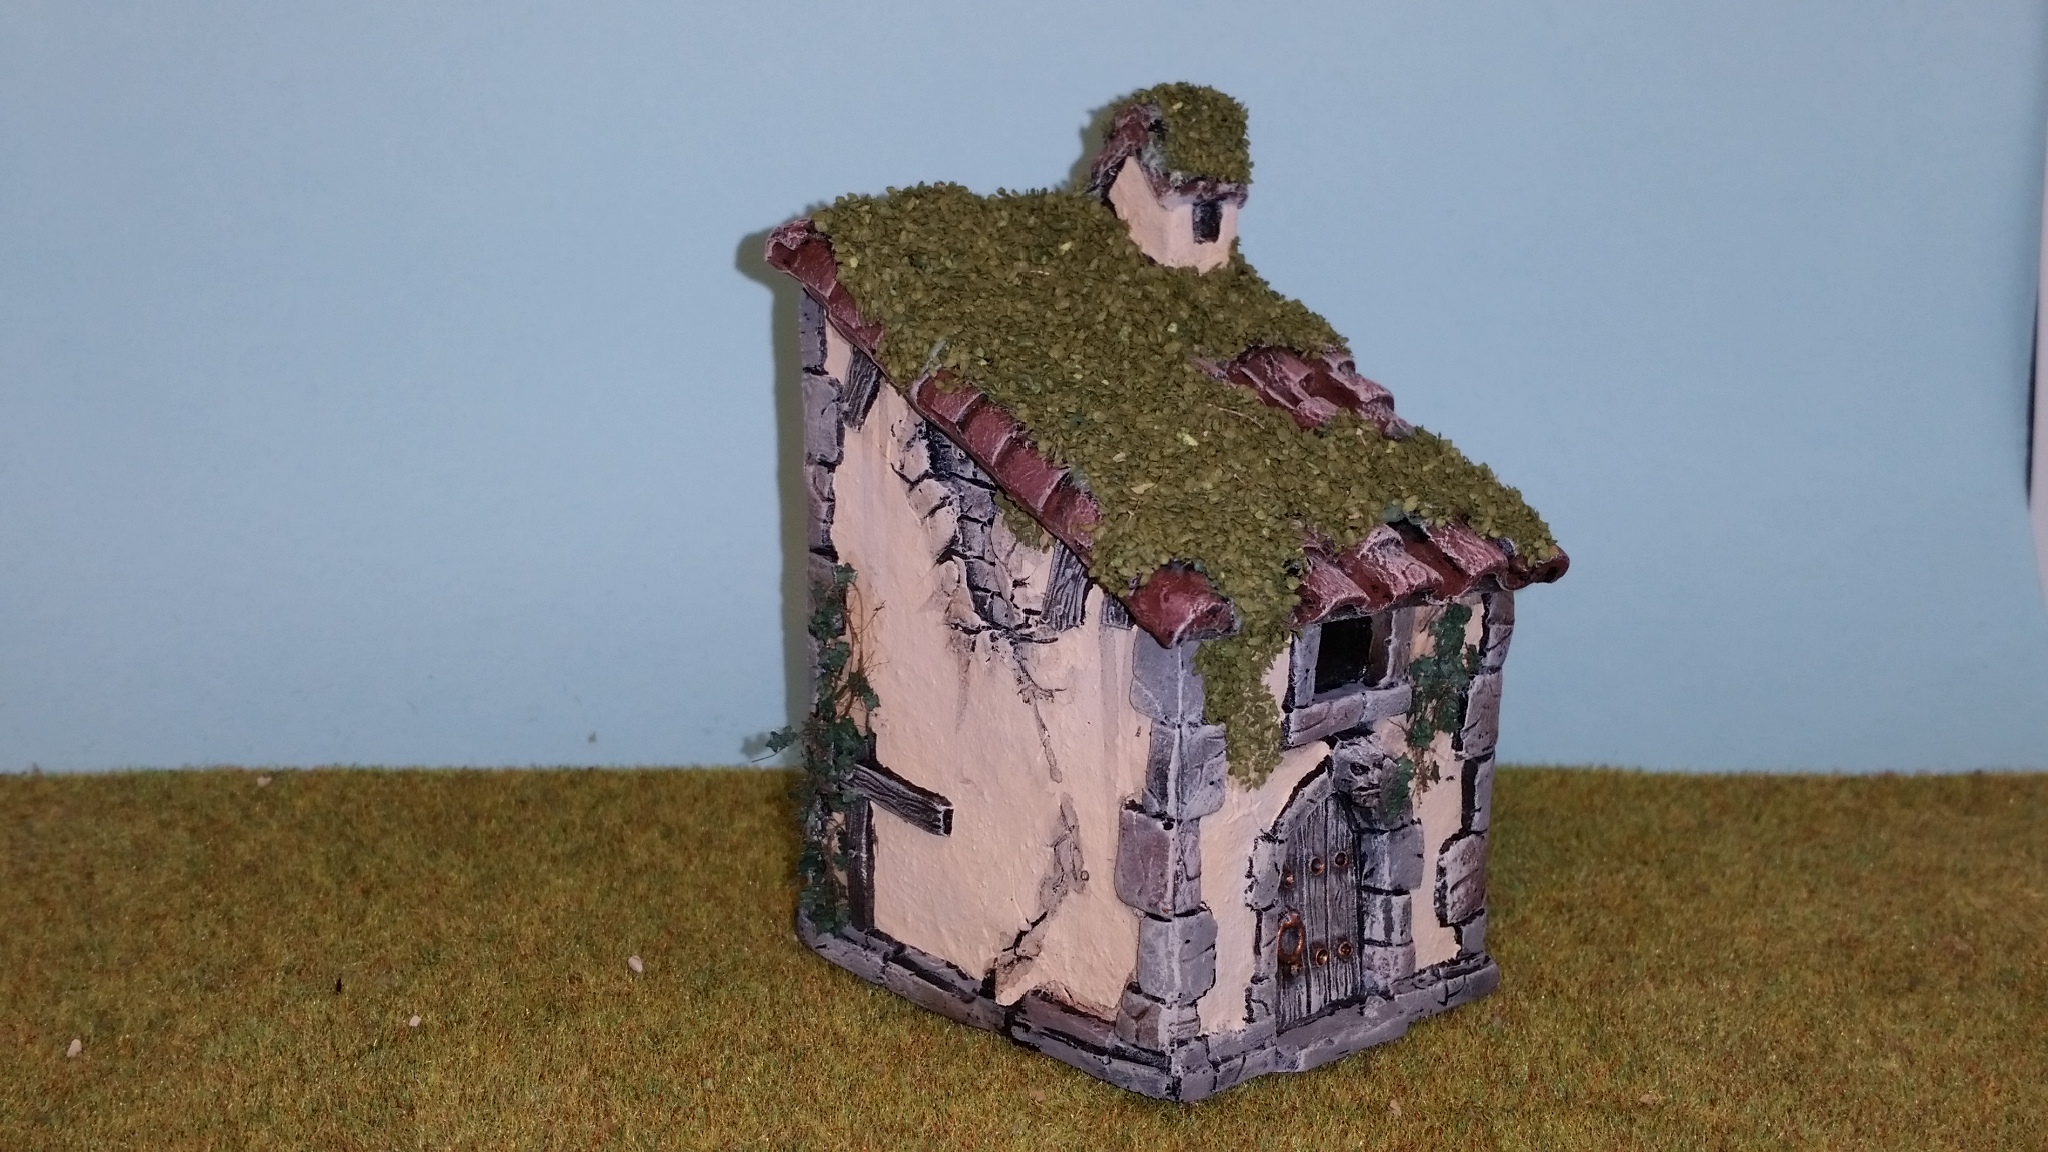
This is, of course, the 2013 Christmas release. I only just got round to doing it -- it's been sat in the box on the table in the hobby room for 12 months. So I cleaned it up, assembled it, filled some small gaps in the joins with miliput and undercoated it. The walls then got coats of Americana "Toffee" which I use for plasterwork on buildings; I think white looks too stark and greys are cold. The stones got two coats of neutral grey and then staining with inks and a drybrush of Howard Hues "Old Wood" as is usual for stonework. Then I went to work with foliage; I decided it would be more useful to turn the "snow" into overgrowth. The roof snow was painted green and then covered with Noch Olive Leaves. The ivy is something that (I think) Warlord sell. The wood got my traditional khaki/light brown/old wood drybrushing and then the metalwork picked out in various CDA colours and several washes of Army Painter inks. The damage on the walls similarly got washes and daubs of ink.


Princess Julianna Dwarfs
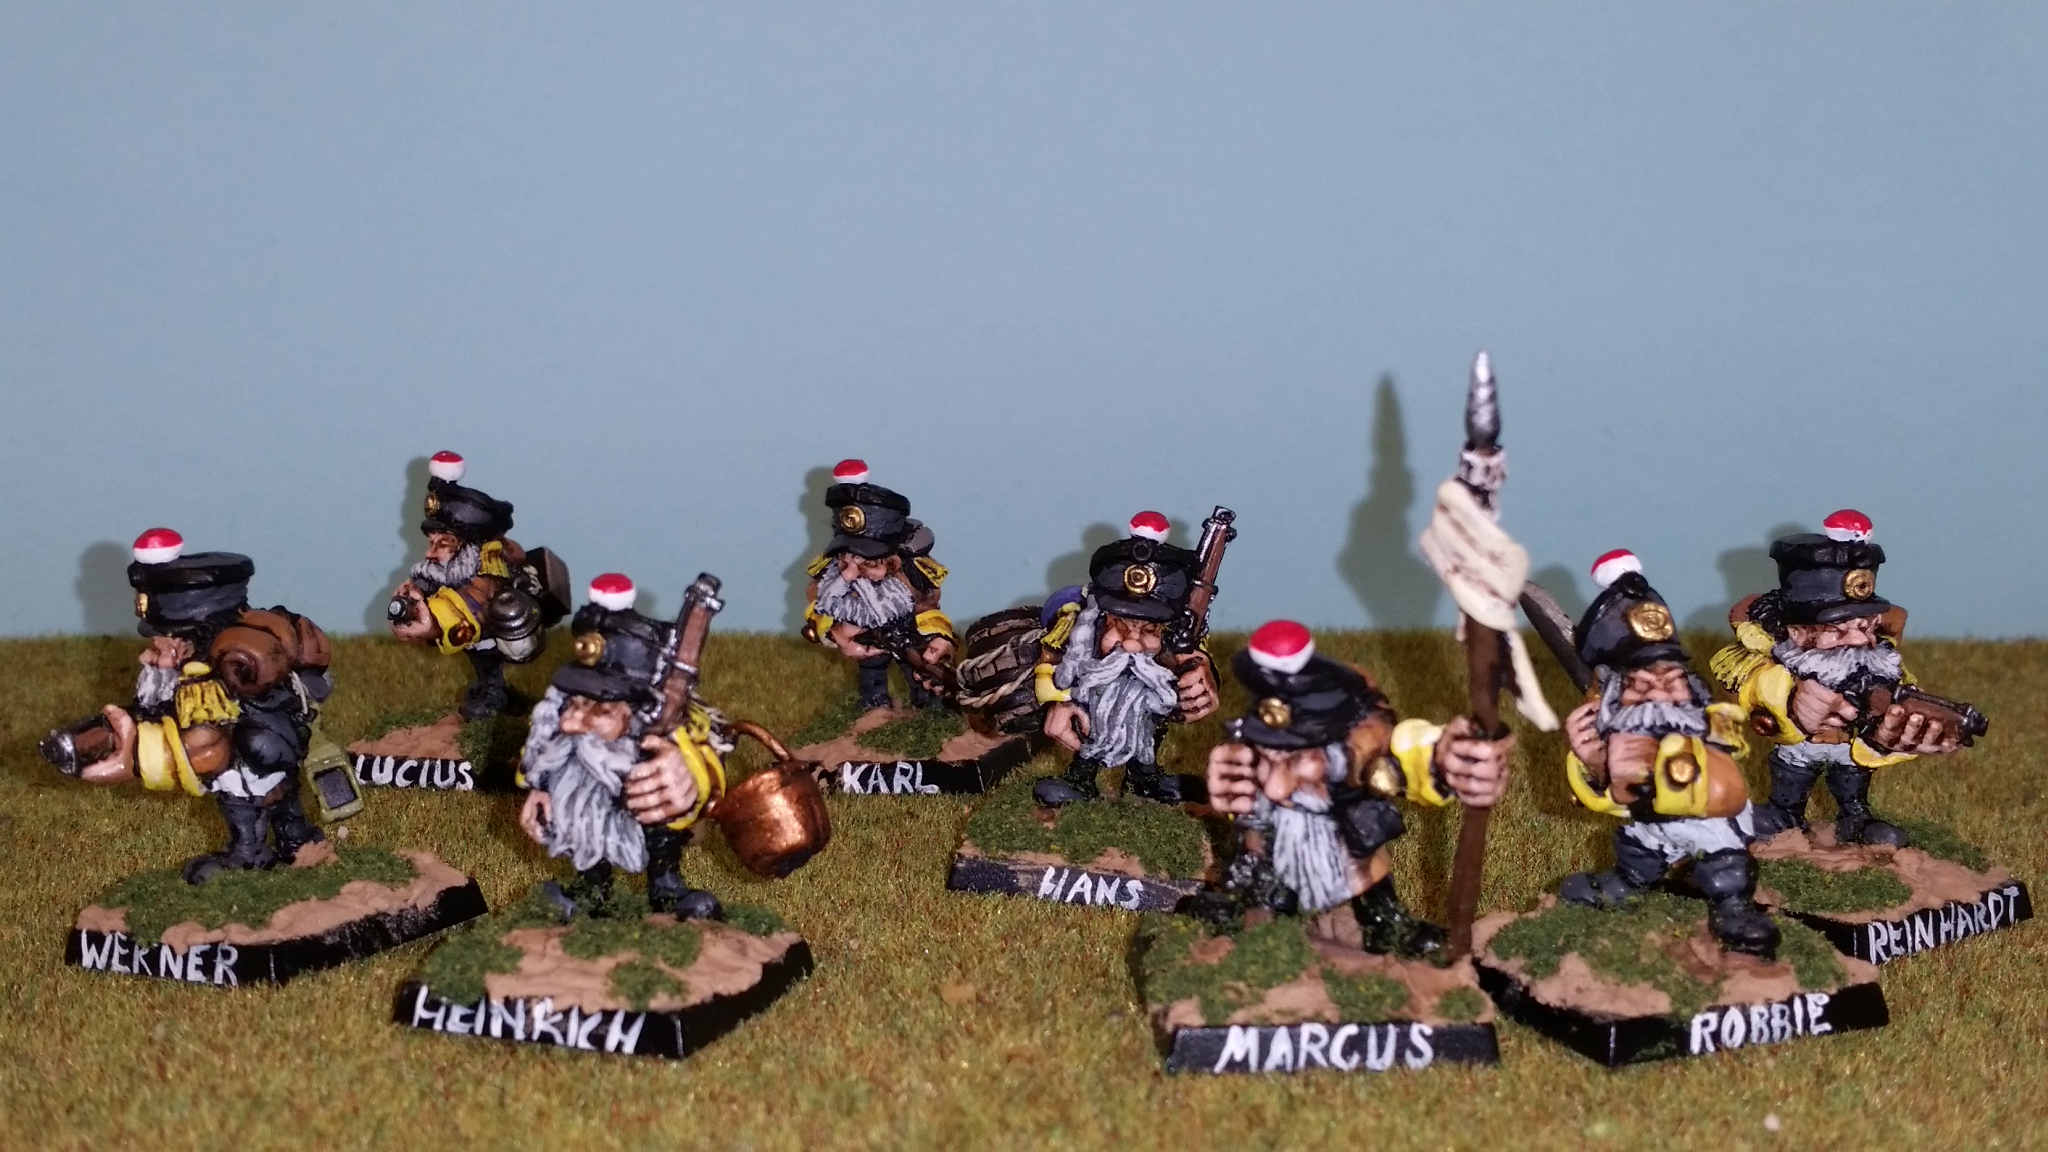
This is half of the limited edition box set -- I thought they looked a bit plain with being duplicate poses, so I added some character by giving them all extra stuff to carry about. In keeping with the idea that they're the staff of a brewery, they're all carrying things that would be part of their jobs; so the chap with the big copper kettle is the brewmeister. The paychest is being carried by the bookkeeper, the nightwatchman has a lamp hanging from his pack and Hans the Cooper is carrying around a barrel. They make a nice 300 point section.

The other half of the box set is also pointed up and makes up 300p of reinforcements but they don't have the customisations.


Von Rottes
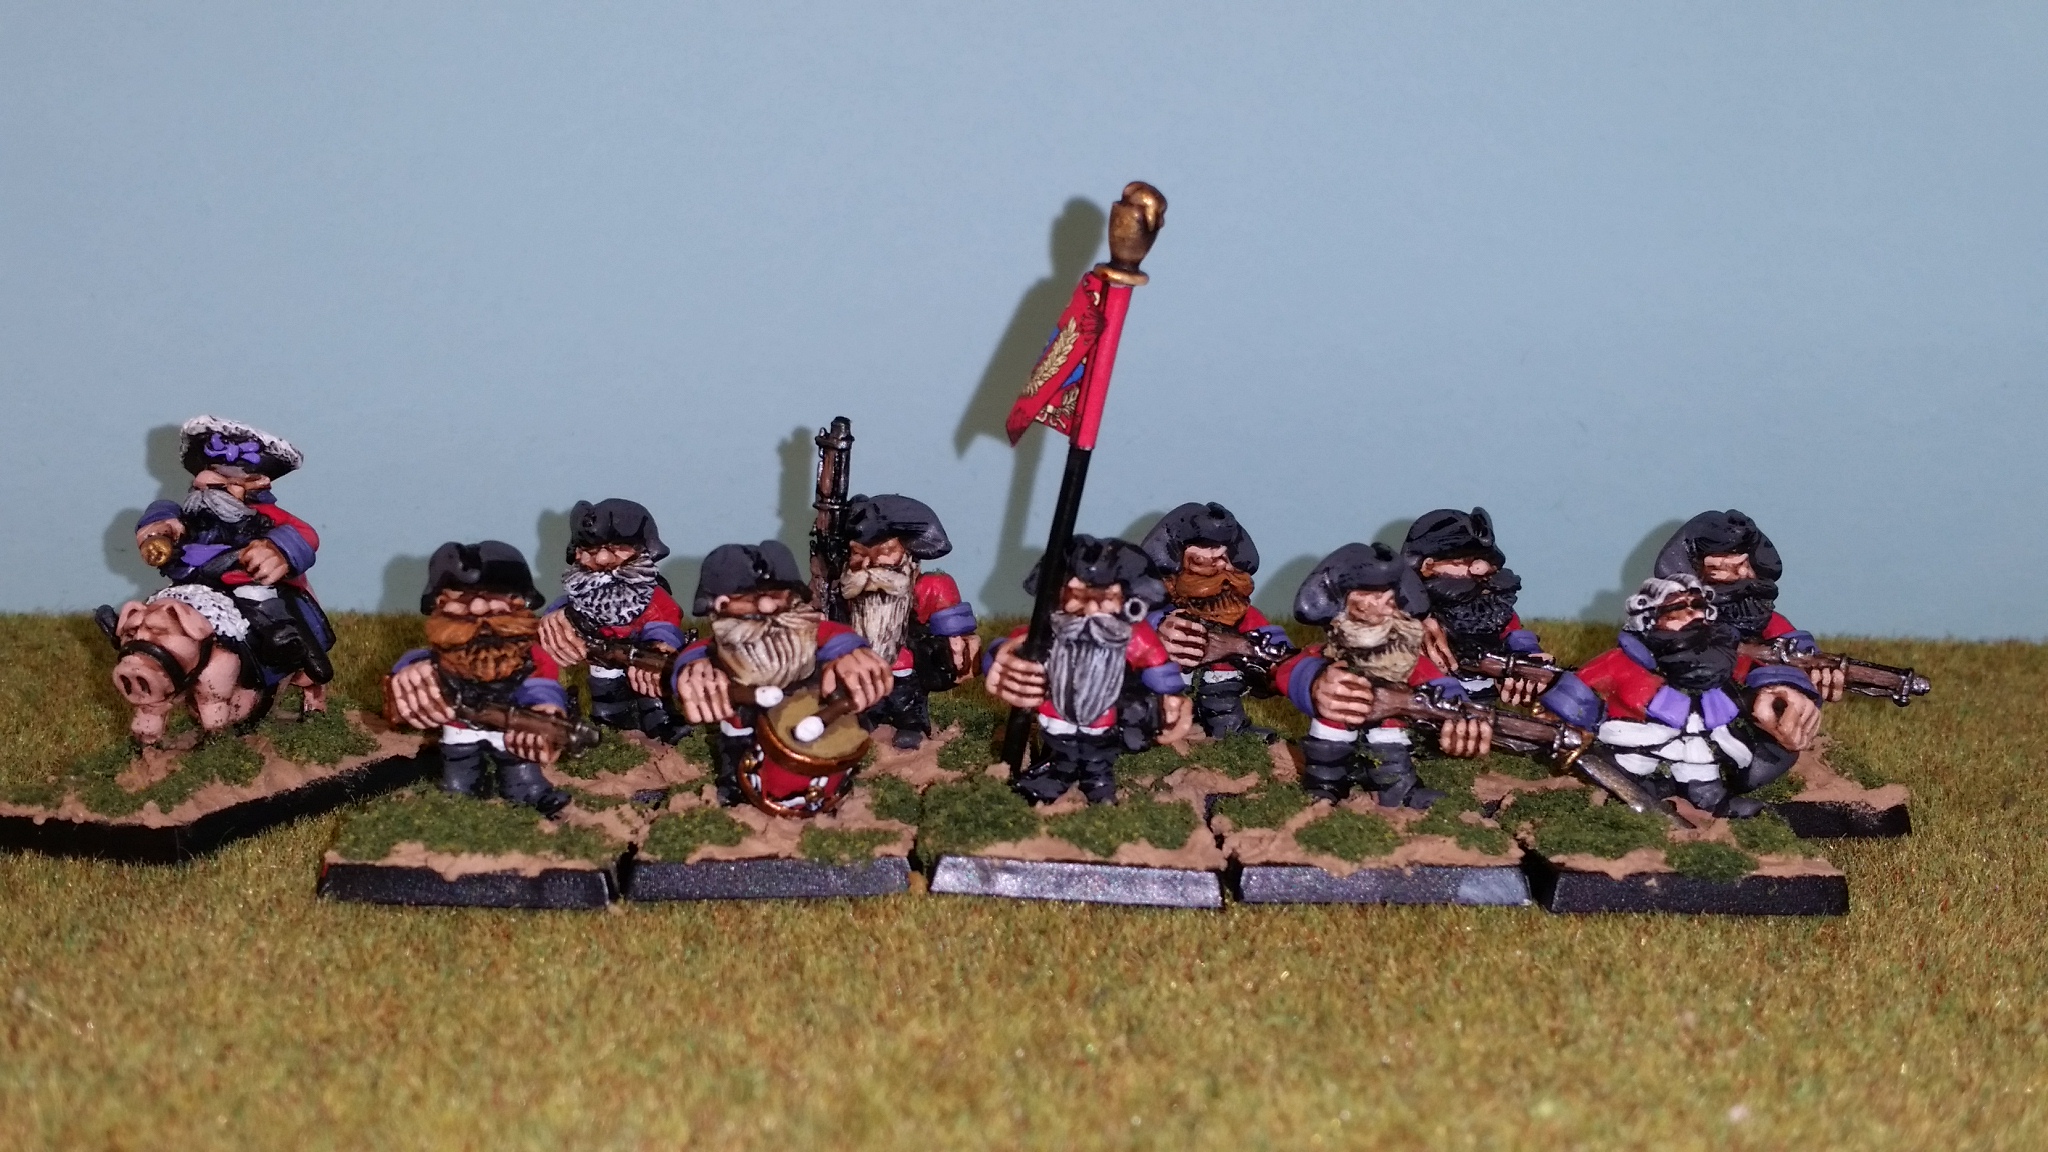
Another 300 point section comes from the Von Rotte infantry -- resplendent in their red uniforms with blue turn-backs. They're accompanied by Von Rotte himself on Bristle.


Dwarf Landwehr
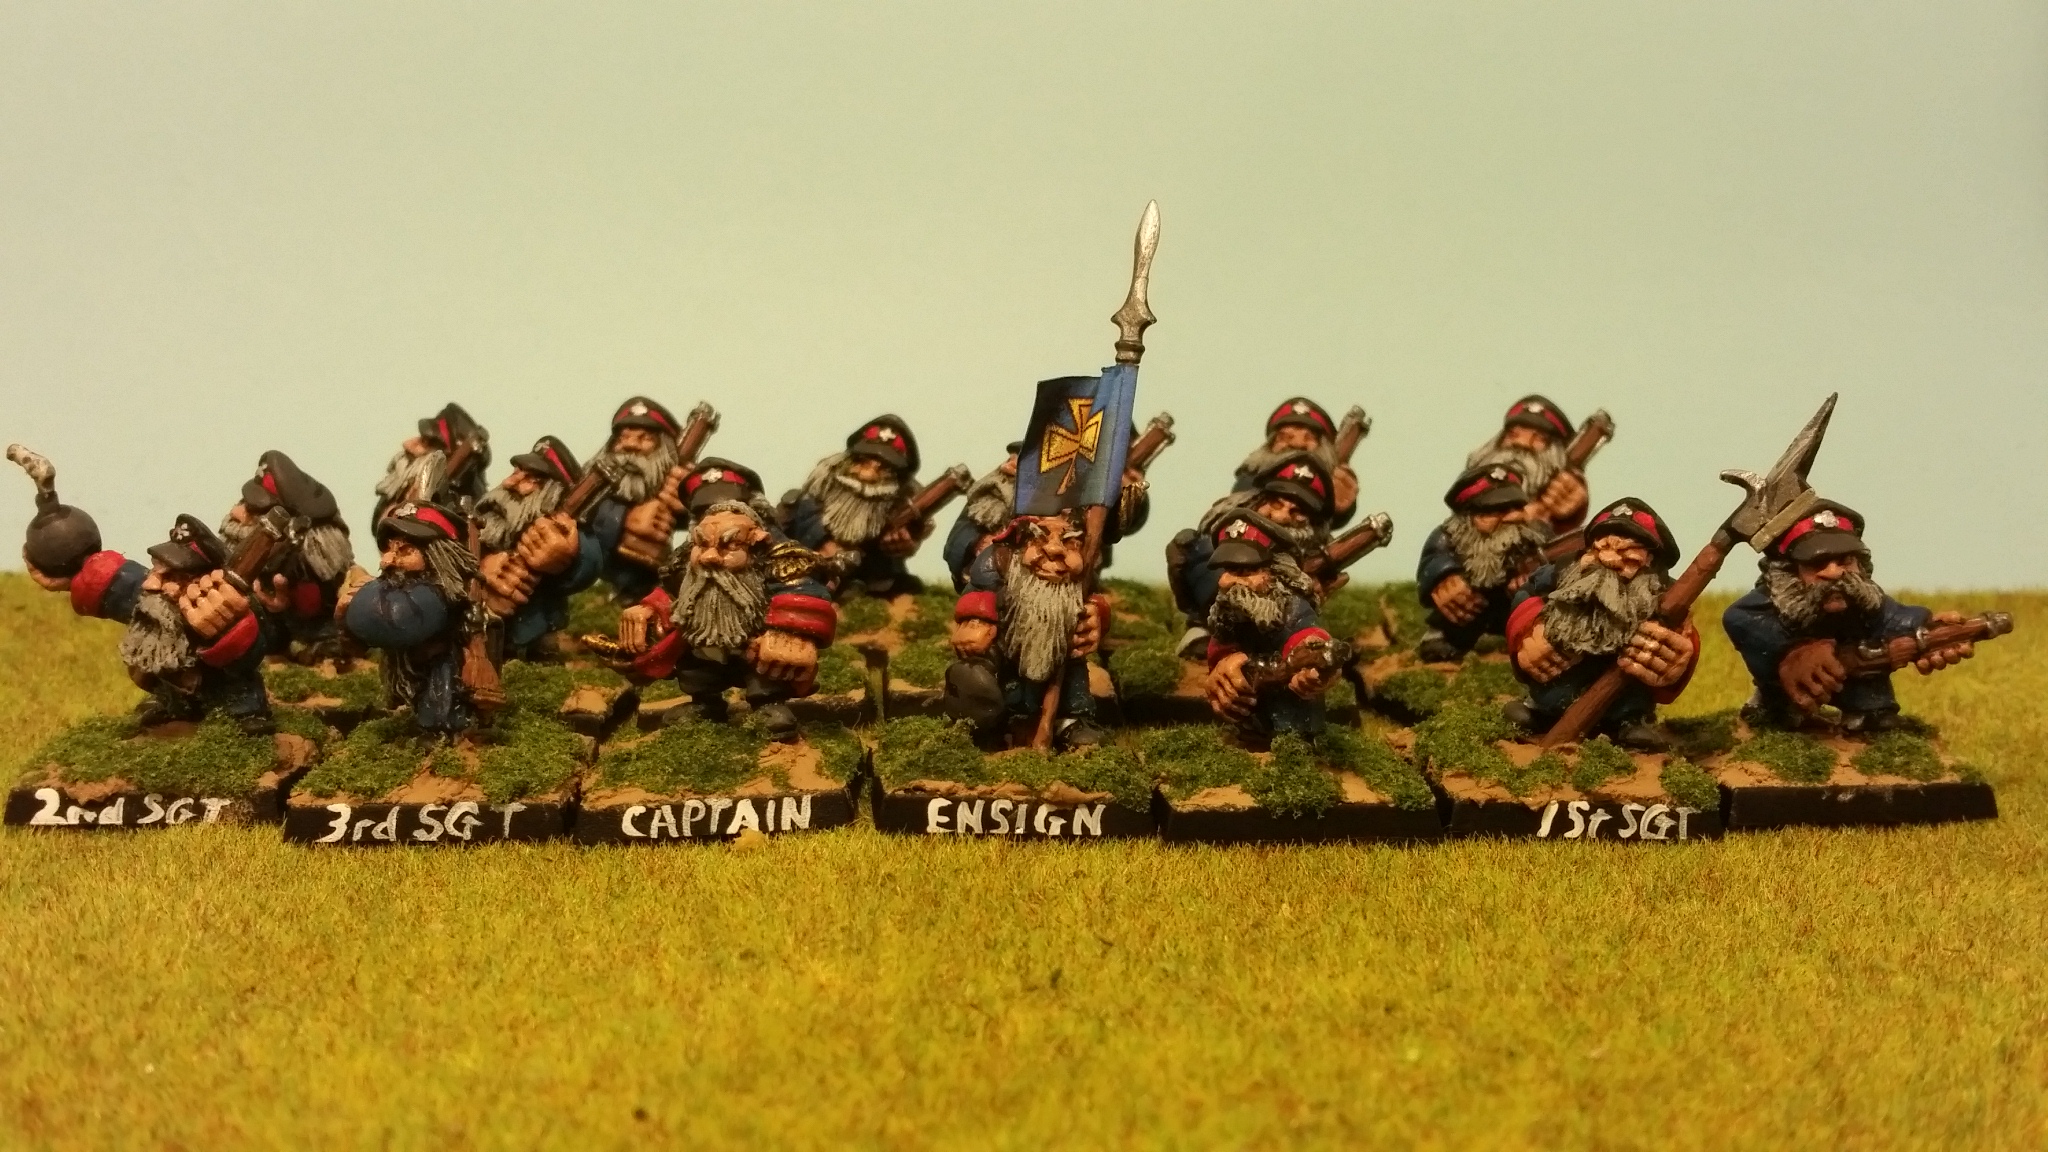
This is the largest of my Flintloque sections. Yes. That's nineteen figures in 300 points. Well, they are mostly militia. The sergeants are regulars (so they can have grenades!). These figures were actually bought in 1999 (the delivery note turned up in a stack of paperwork I was sorting out) when I was planning on taking up Slaughterloo. They're in blue uniforms and red turnbacks/hatbands which means they can take on the role of militia attached to either the Ferach or Orcish forces.


Saturday, 15 November 2014

Have you ever wondered...

what it would be like if you built a Fantasy Warriors army from figures you had lying around the house?

Well. That's what I did. (Well, mostly. I'll fess up to cheating very slightly later).

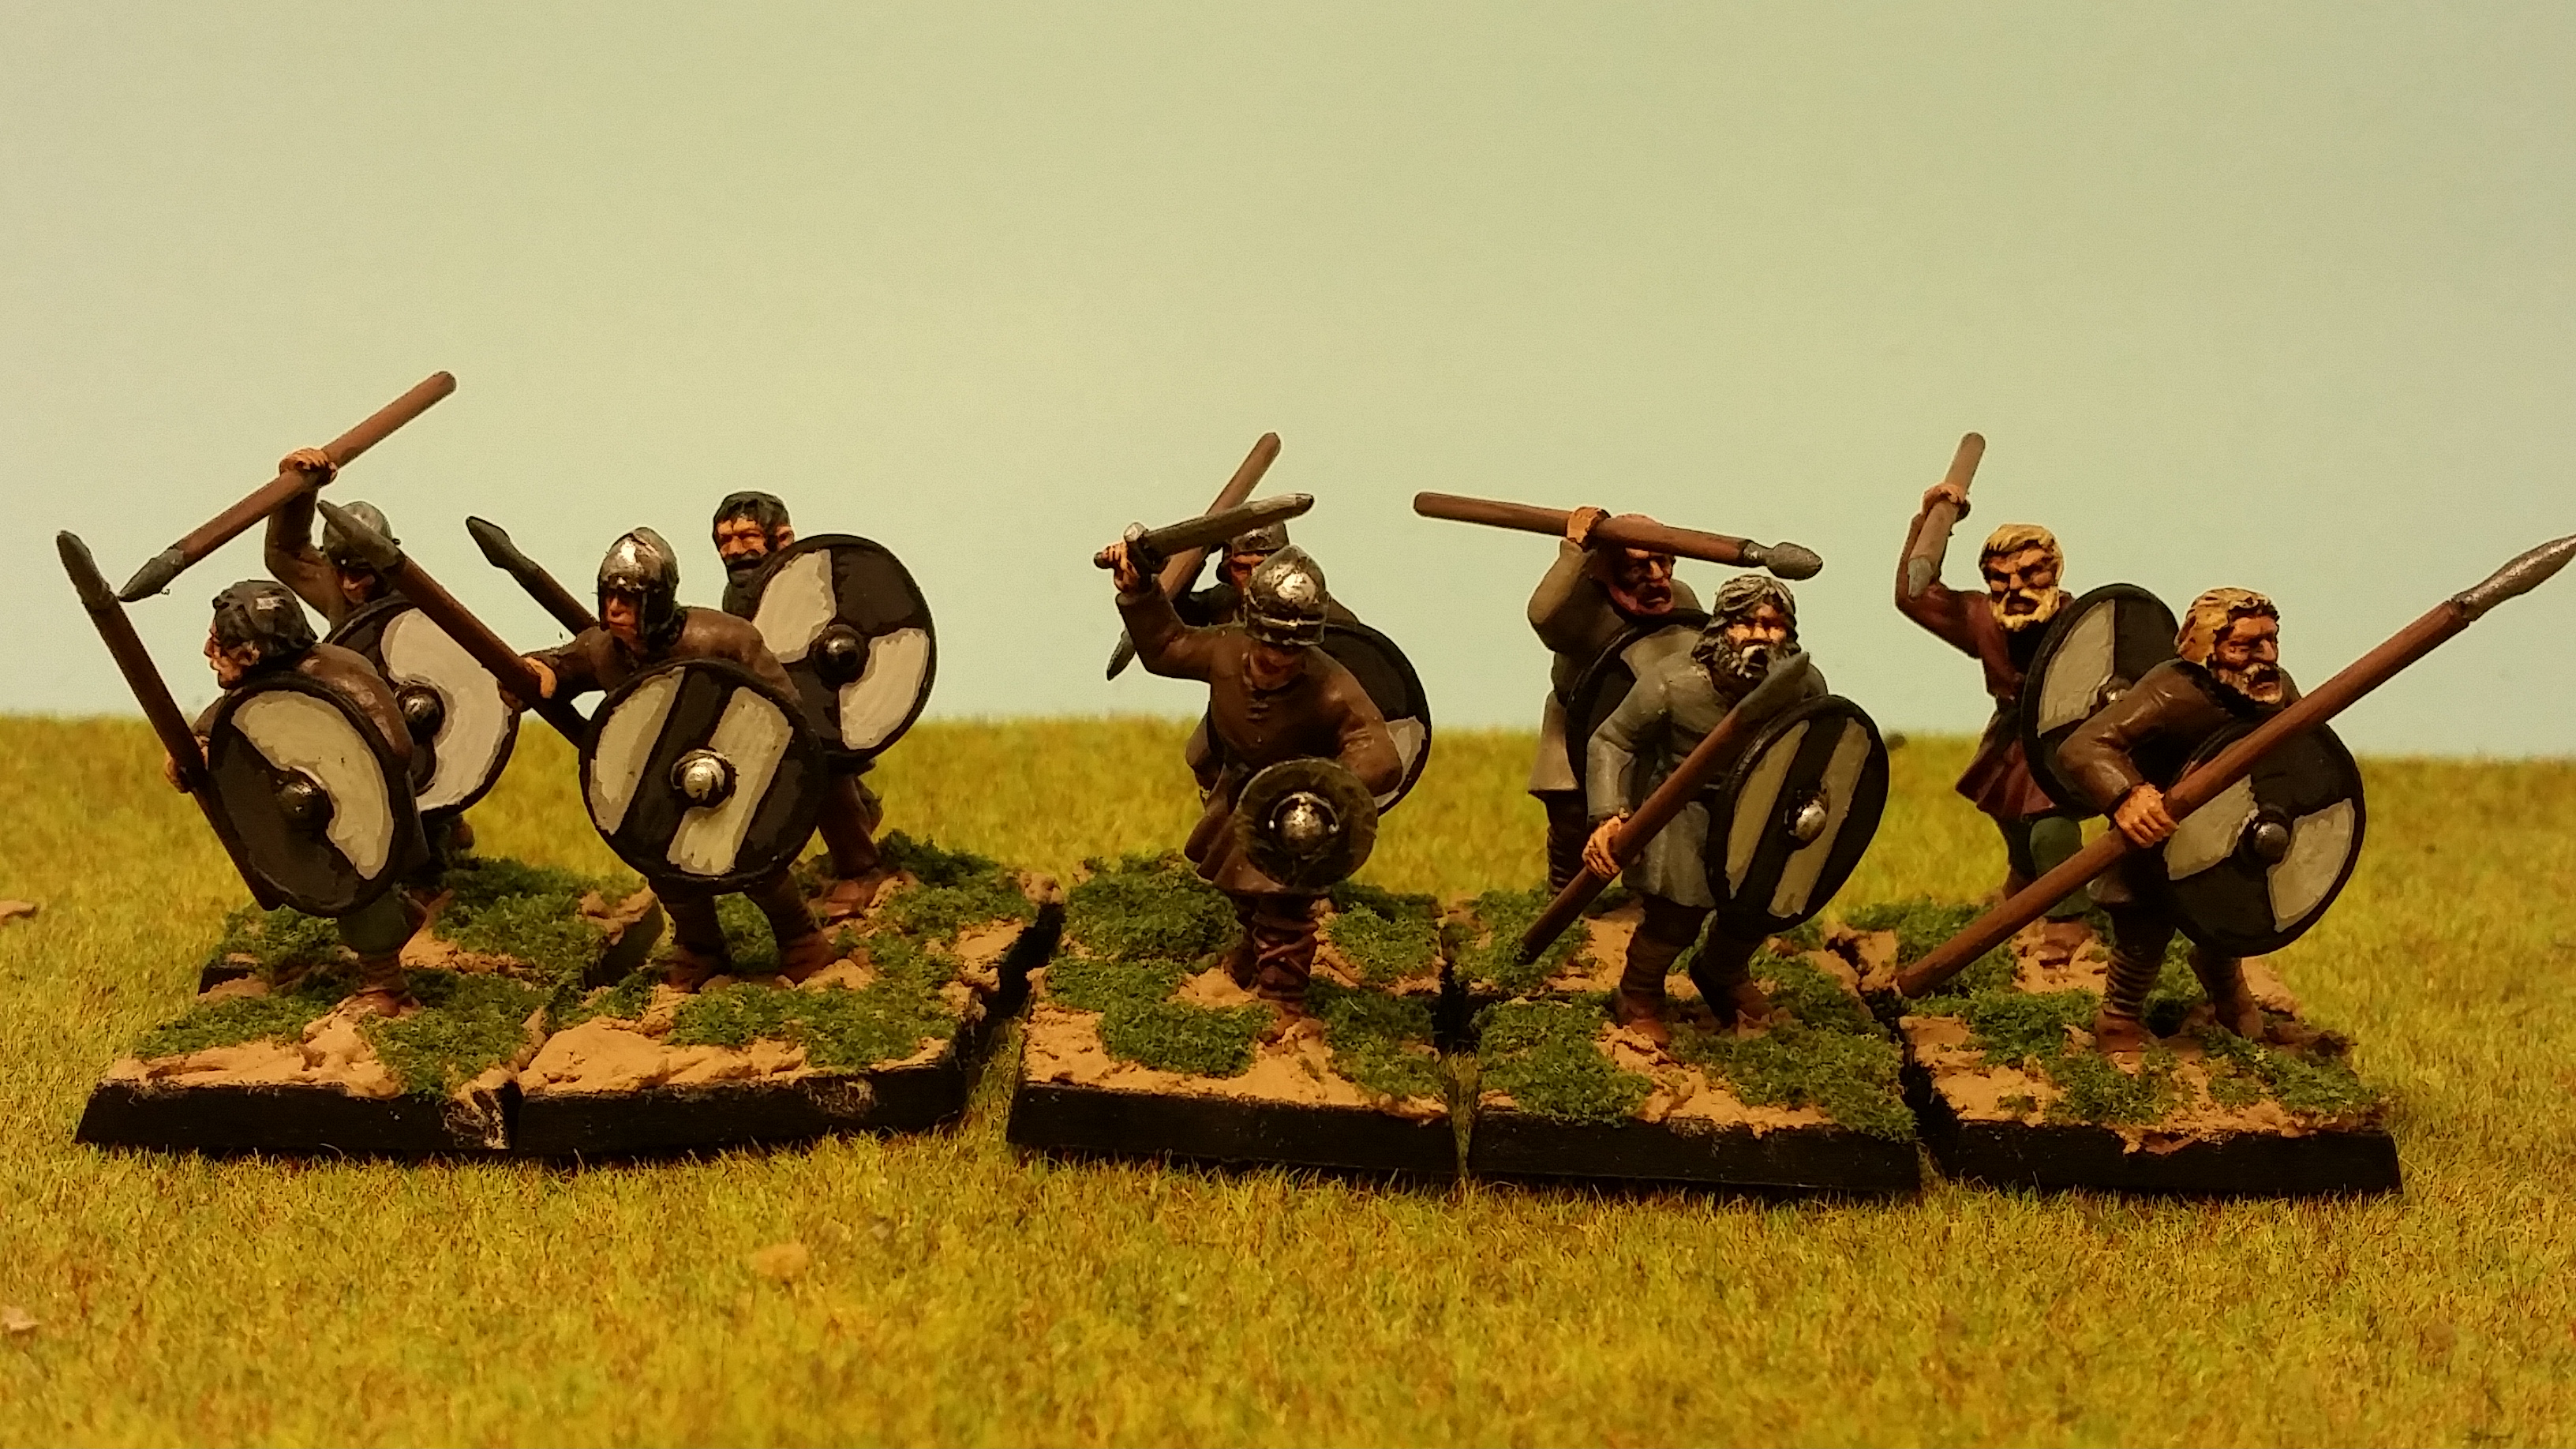
So the obvious army to pick is the "Men-at-Arms" which is basically a War of the Roses army -- and it turns out I have two boxes of Perry plastics with a couple of test figures assembled. Also nearby is a box of Gripping Beast dark age warriors.

So the warriors can make the peasant levy;

10 figures and a leader makes a 30p unit.

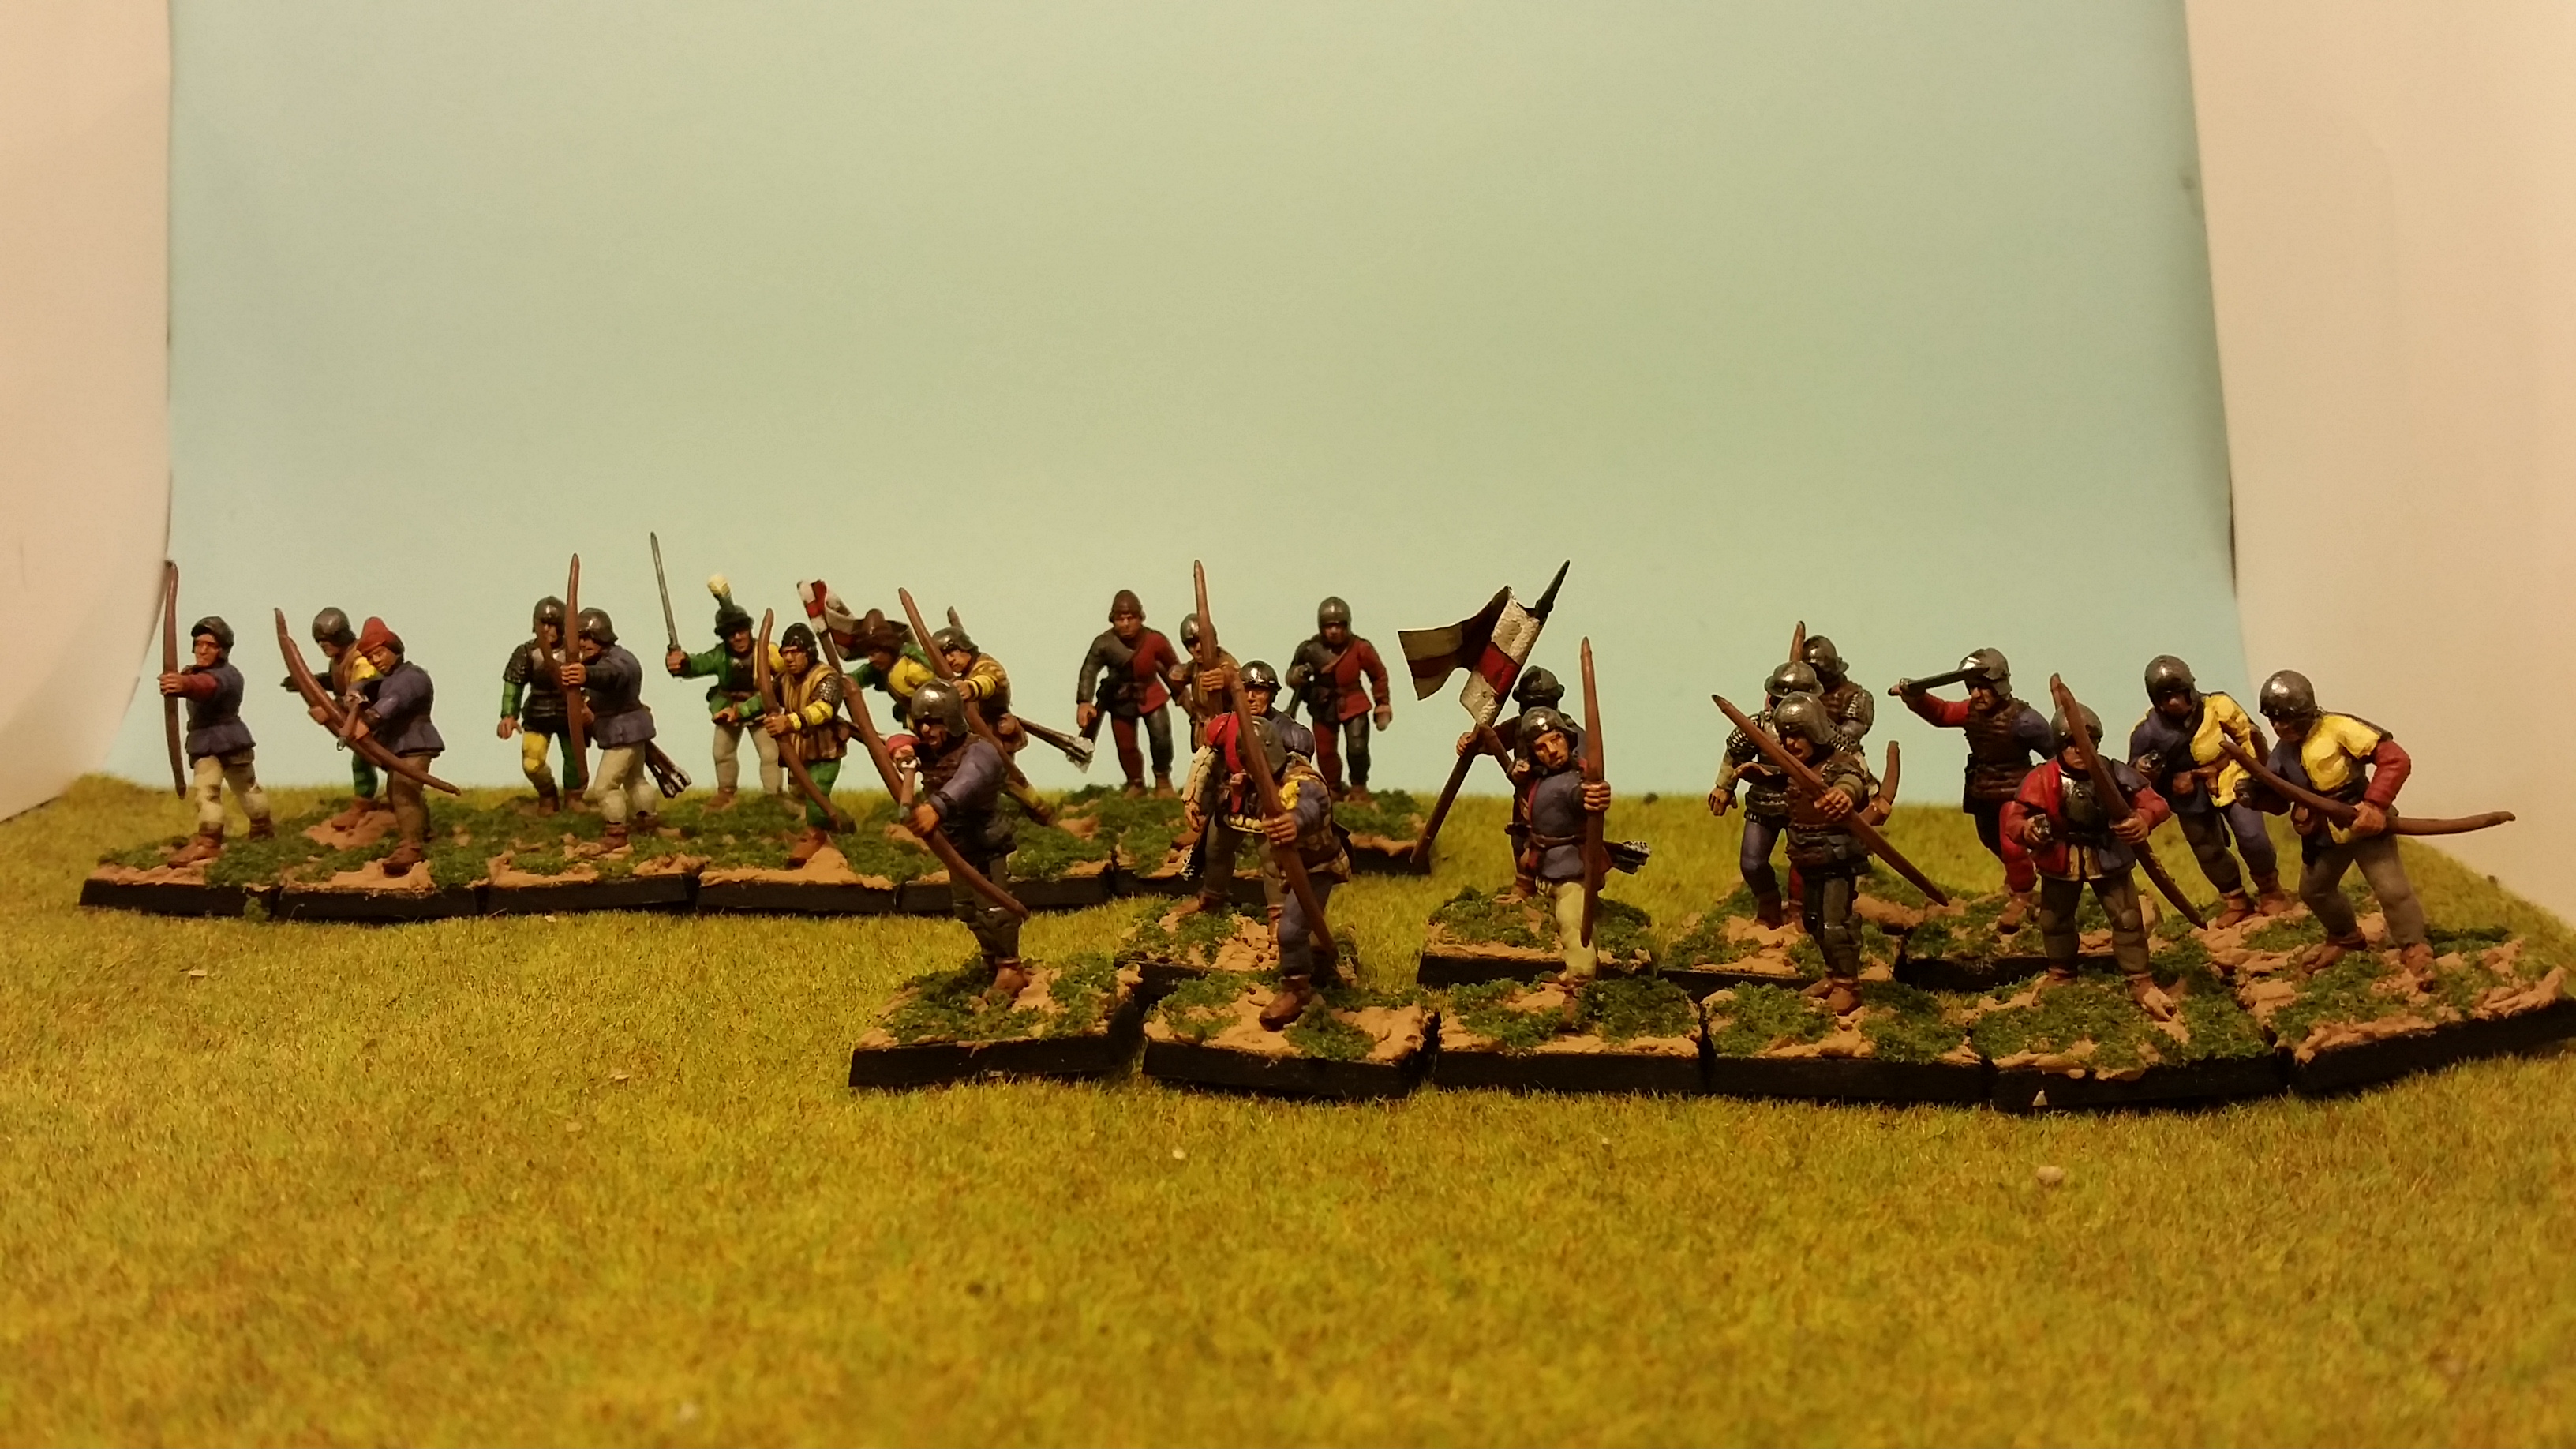
The various retinues will provide bows, bills and men-at-arms.


Two 80p units of bows. Each has 12 figures, leader and banner.


The bills are a 70p unit of 10 figures, leader, banner and musician.


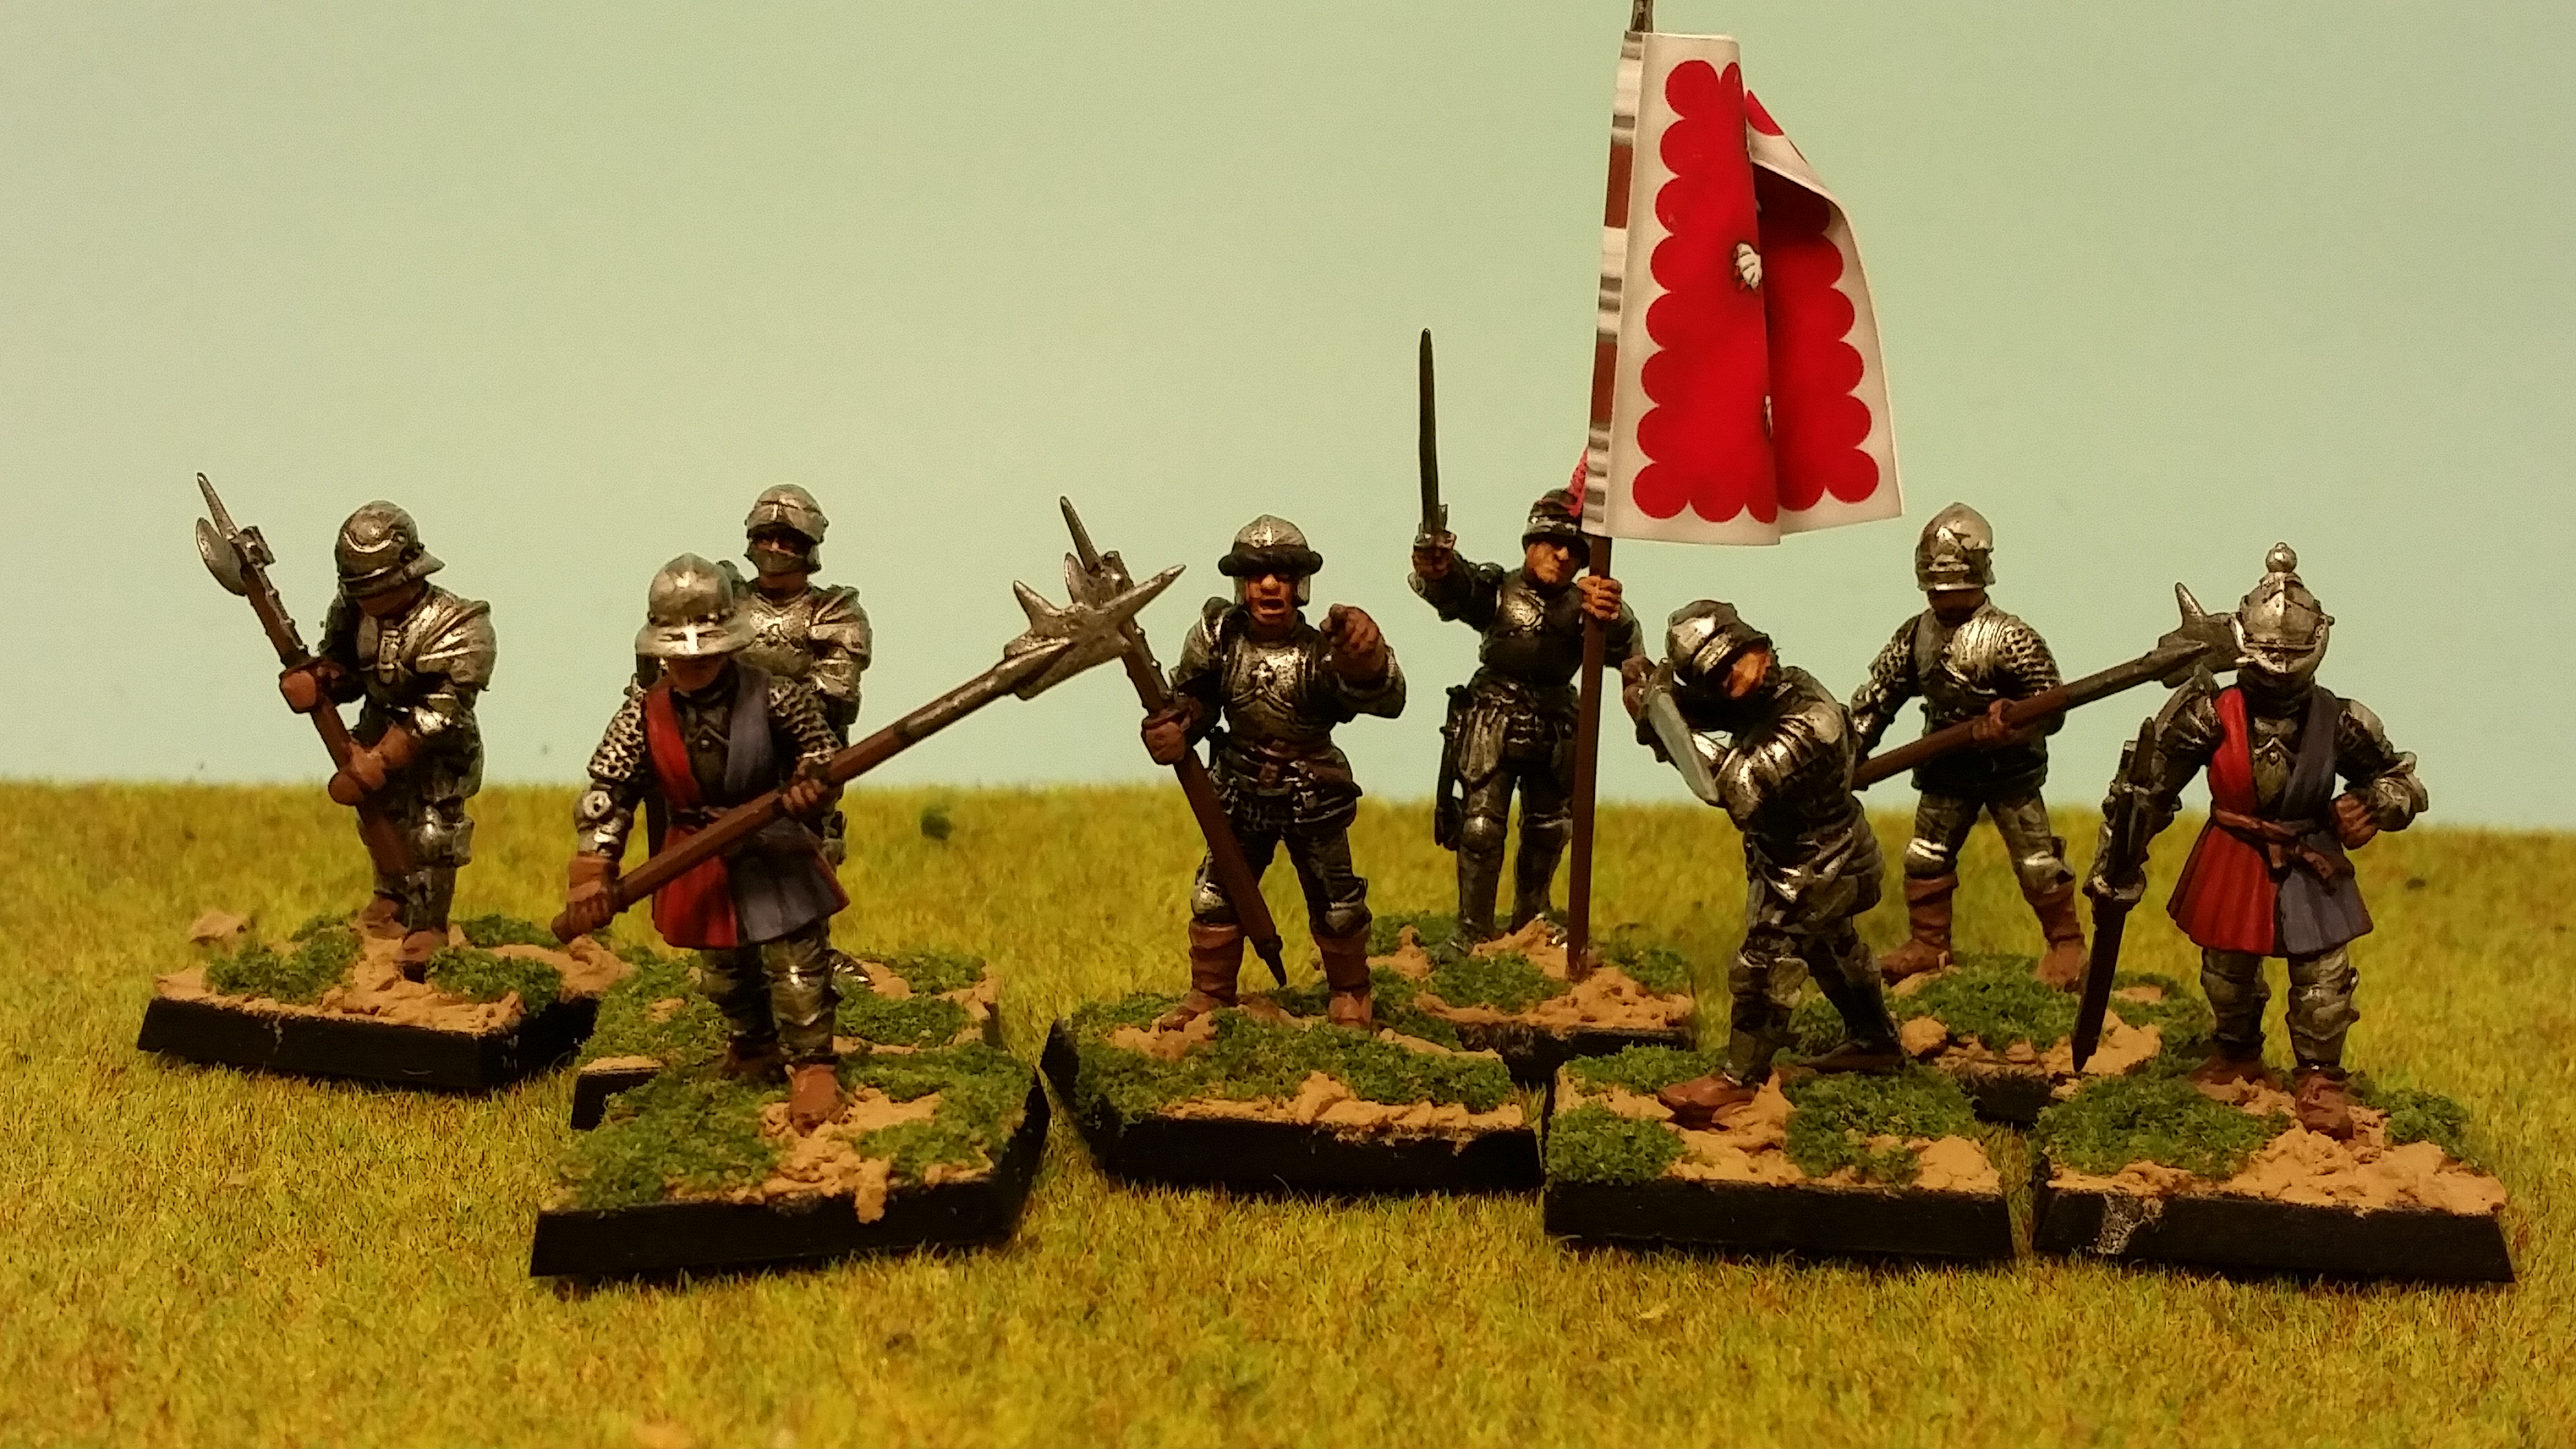
The men-at-arms are the smallest constitute of each retinue, combined they're a 268p unit of 8 figures including a leader and banner.


That's clearly not enough shooting or fighting units, so we better hire some mercenaries.
12 crossbows for 80p...


...and 12 handgunners for 80p should add some shooting.


12 pike with leader and banner and musician for 66p will bulk out the fighting units.


Right, that's the army soldiers. Shooting units need resource markers to track their ammunition. There are tokens that come with FW, but they're fiddly and there's obvious opportunities there to make neater stuff.


This is where I started cheating a bit. First off, I bought some of the excellent casualty markers from Warbases. Then I wandered around a Partizan collecting bits and bobs. Some of the figures are the Perry metal pack of workers; the others are from Courteys/First Corps who make a fantastic dark age civilian pack. The barrels and other equipment are plastic Renedra, the brilliantly named "Dead Man's Baggage" pack and several sets from Warfare Miniatures. The pack horses are Redoubt. Mixed together, dry-brushed, washed and based up on the casualty markers they make much more atmospheric supply counters.

Then we need some leaders. We'll stick with foot versions to keep the costs down.

A war chief and two battle leaders adds up to 246p.

The battle leaders are a Joan d'Arc (give-away with Warhammer Historical's Age of Chivalry), and "Martin Schwartz" (a Partizan give-away). The war chief is (I think) a figure from Colonel Bill's Dark Age heroes range. These were all in the store of unpainted figures.

I also built a couple of extra bits for the army; the chap at the back is the paymaster (Perry figure and Warfare extras) and the encampment is from the First Corps pack. The blacksmith at the very back is another Partizan give-away figure from several years ago. He's slightly out of era, but never mind.

So that was quite an interesting project. I'm just waiting for their opponents to be painted to try them out...

Monday, 4 August 2014

Terrain Building

So it's not all painting figures. There's other boring but necessary parts of wargaming and now we come to that sort of work...

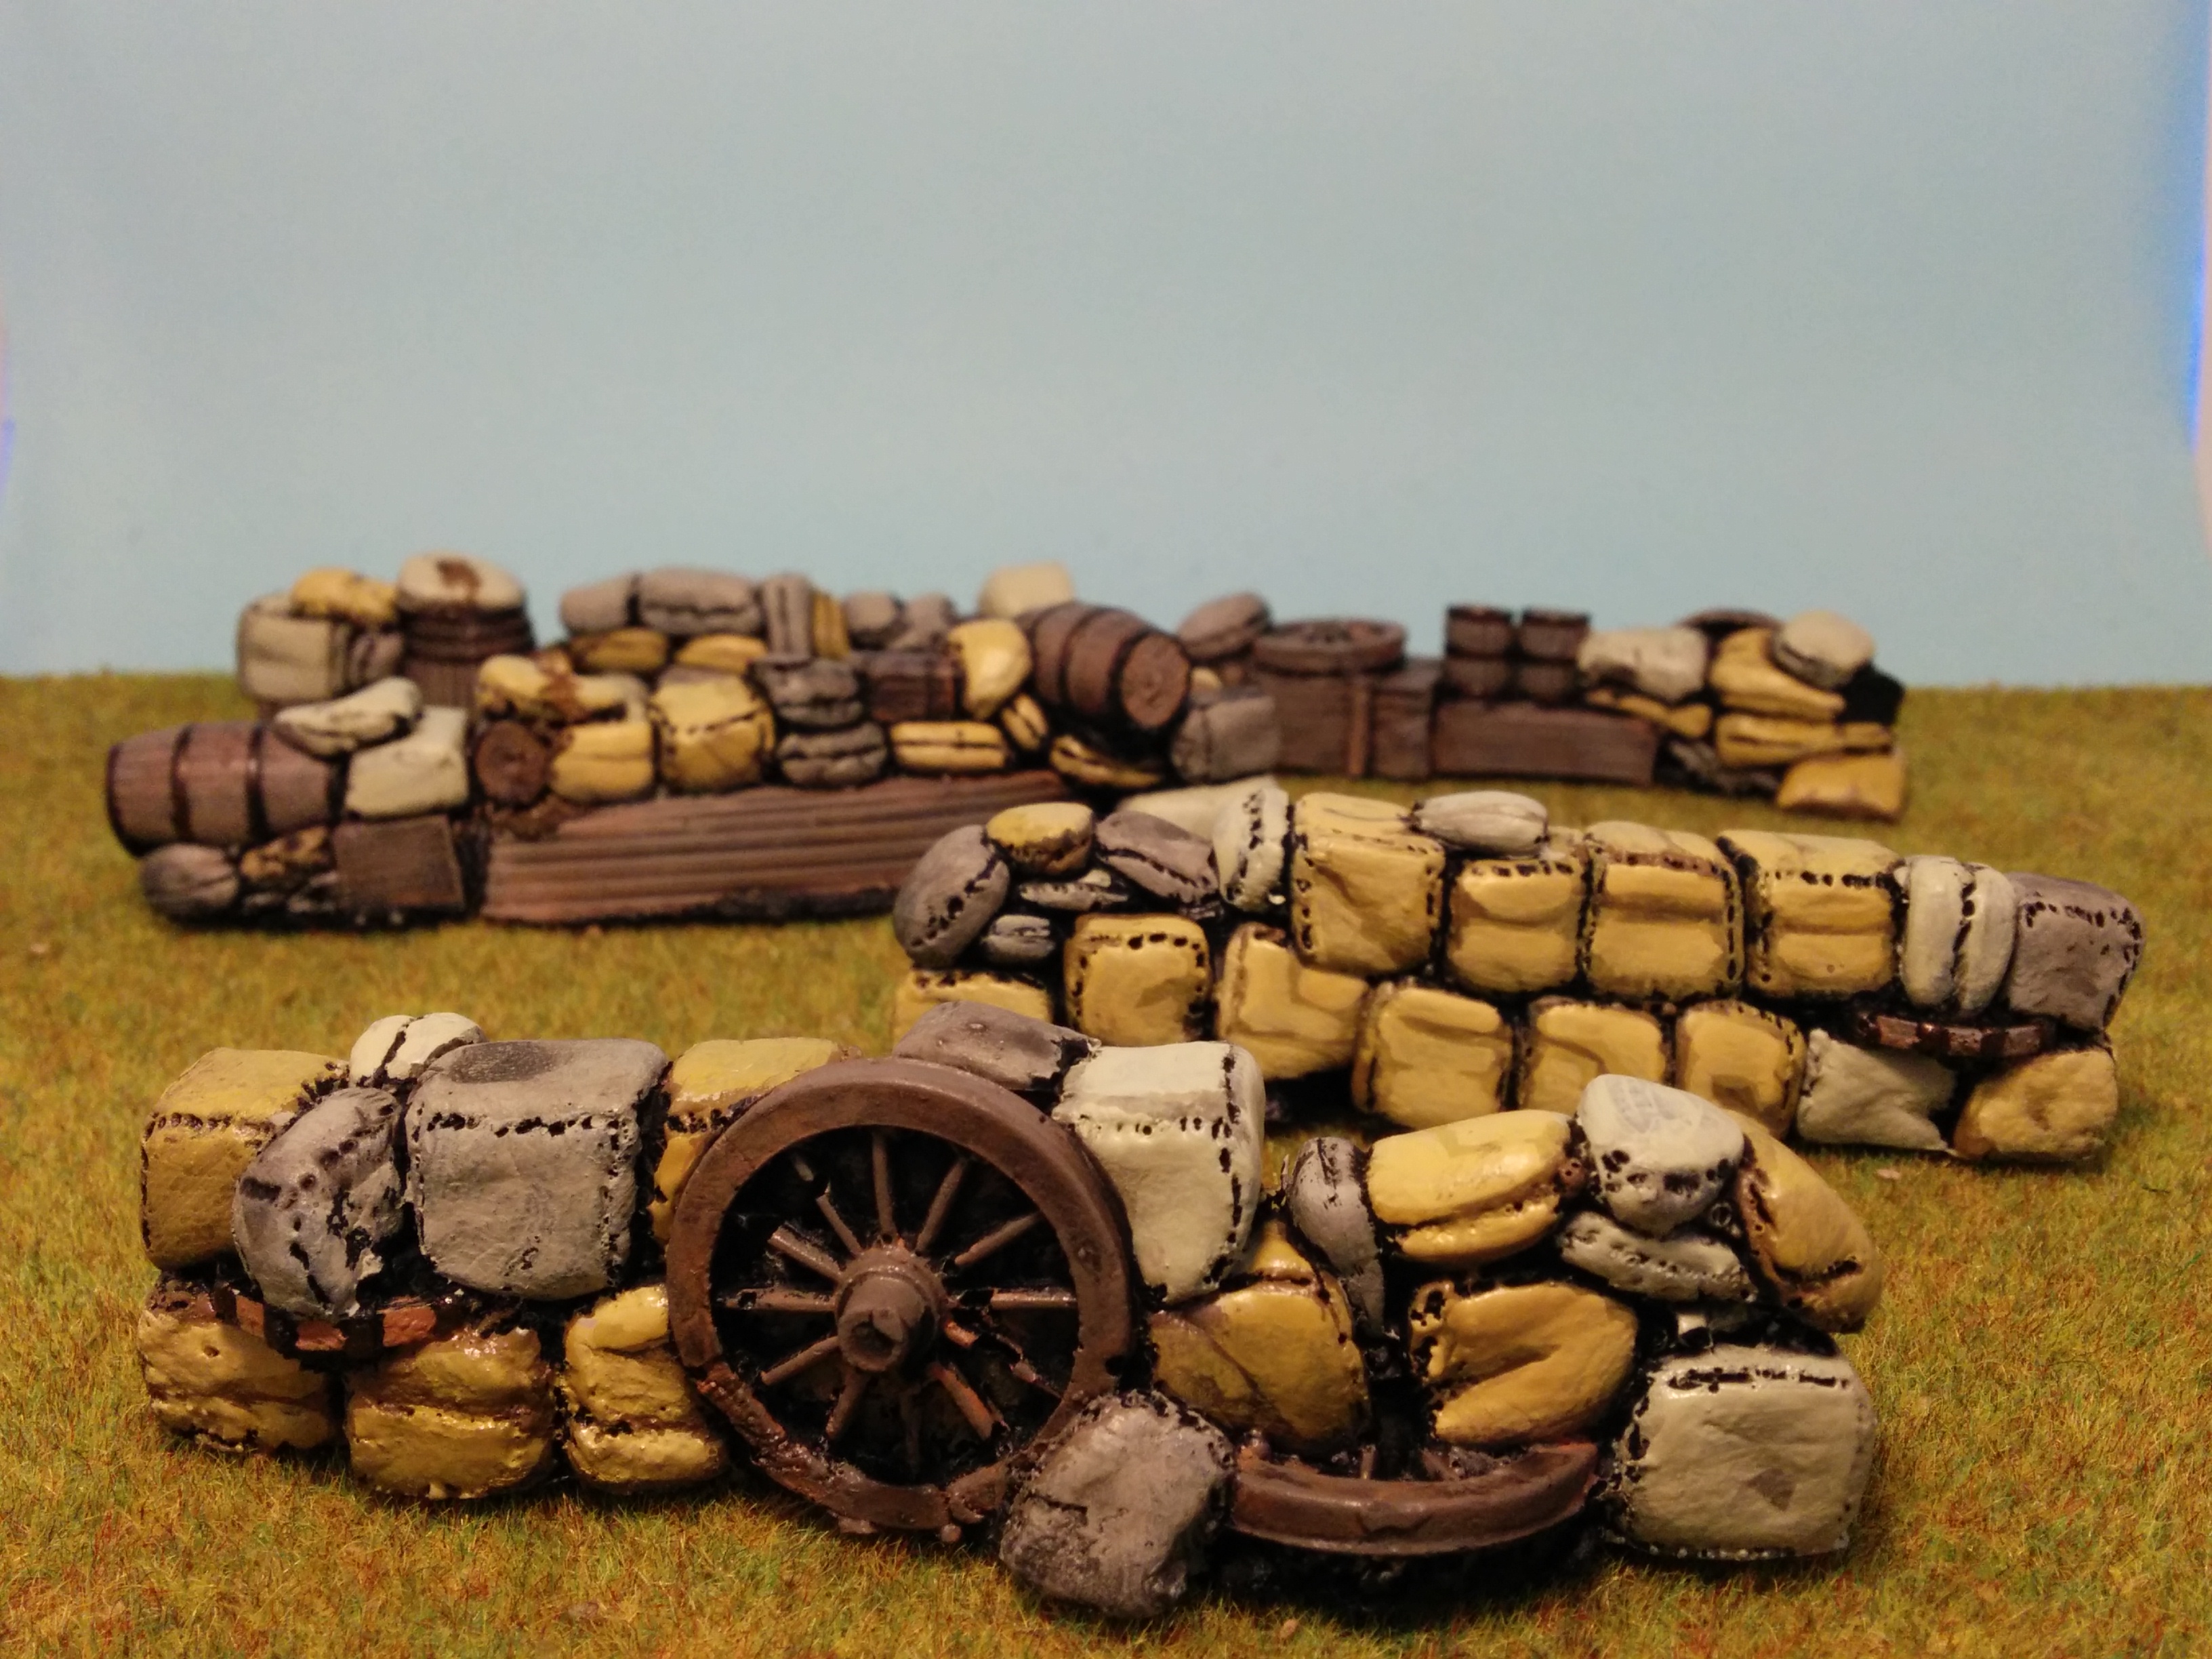
First up, barricades.


They're resin castings that have been lying about half-painted in a drawer for ages. I stripped the half-paint off them and re-did them. There were a couple of casting flaws which I thought about filling and then decided to model as splits in the bags -- a scattering of fine ballast in the hole and around the sacks completed that look. I wish I could tell you who made them, but I honestly can't remember.

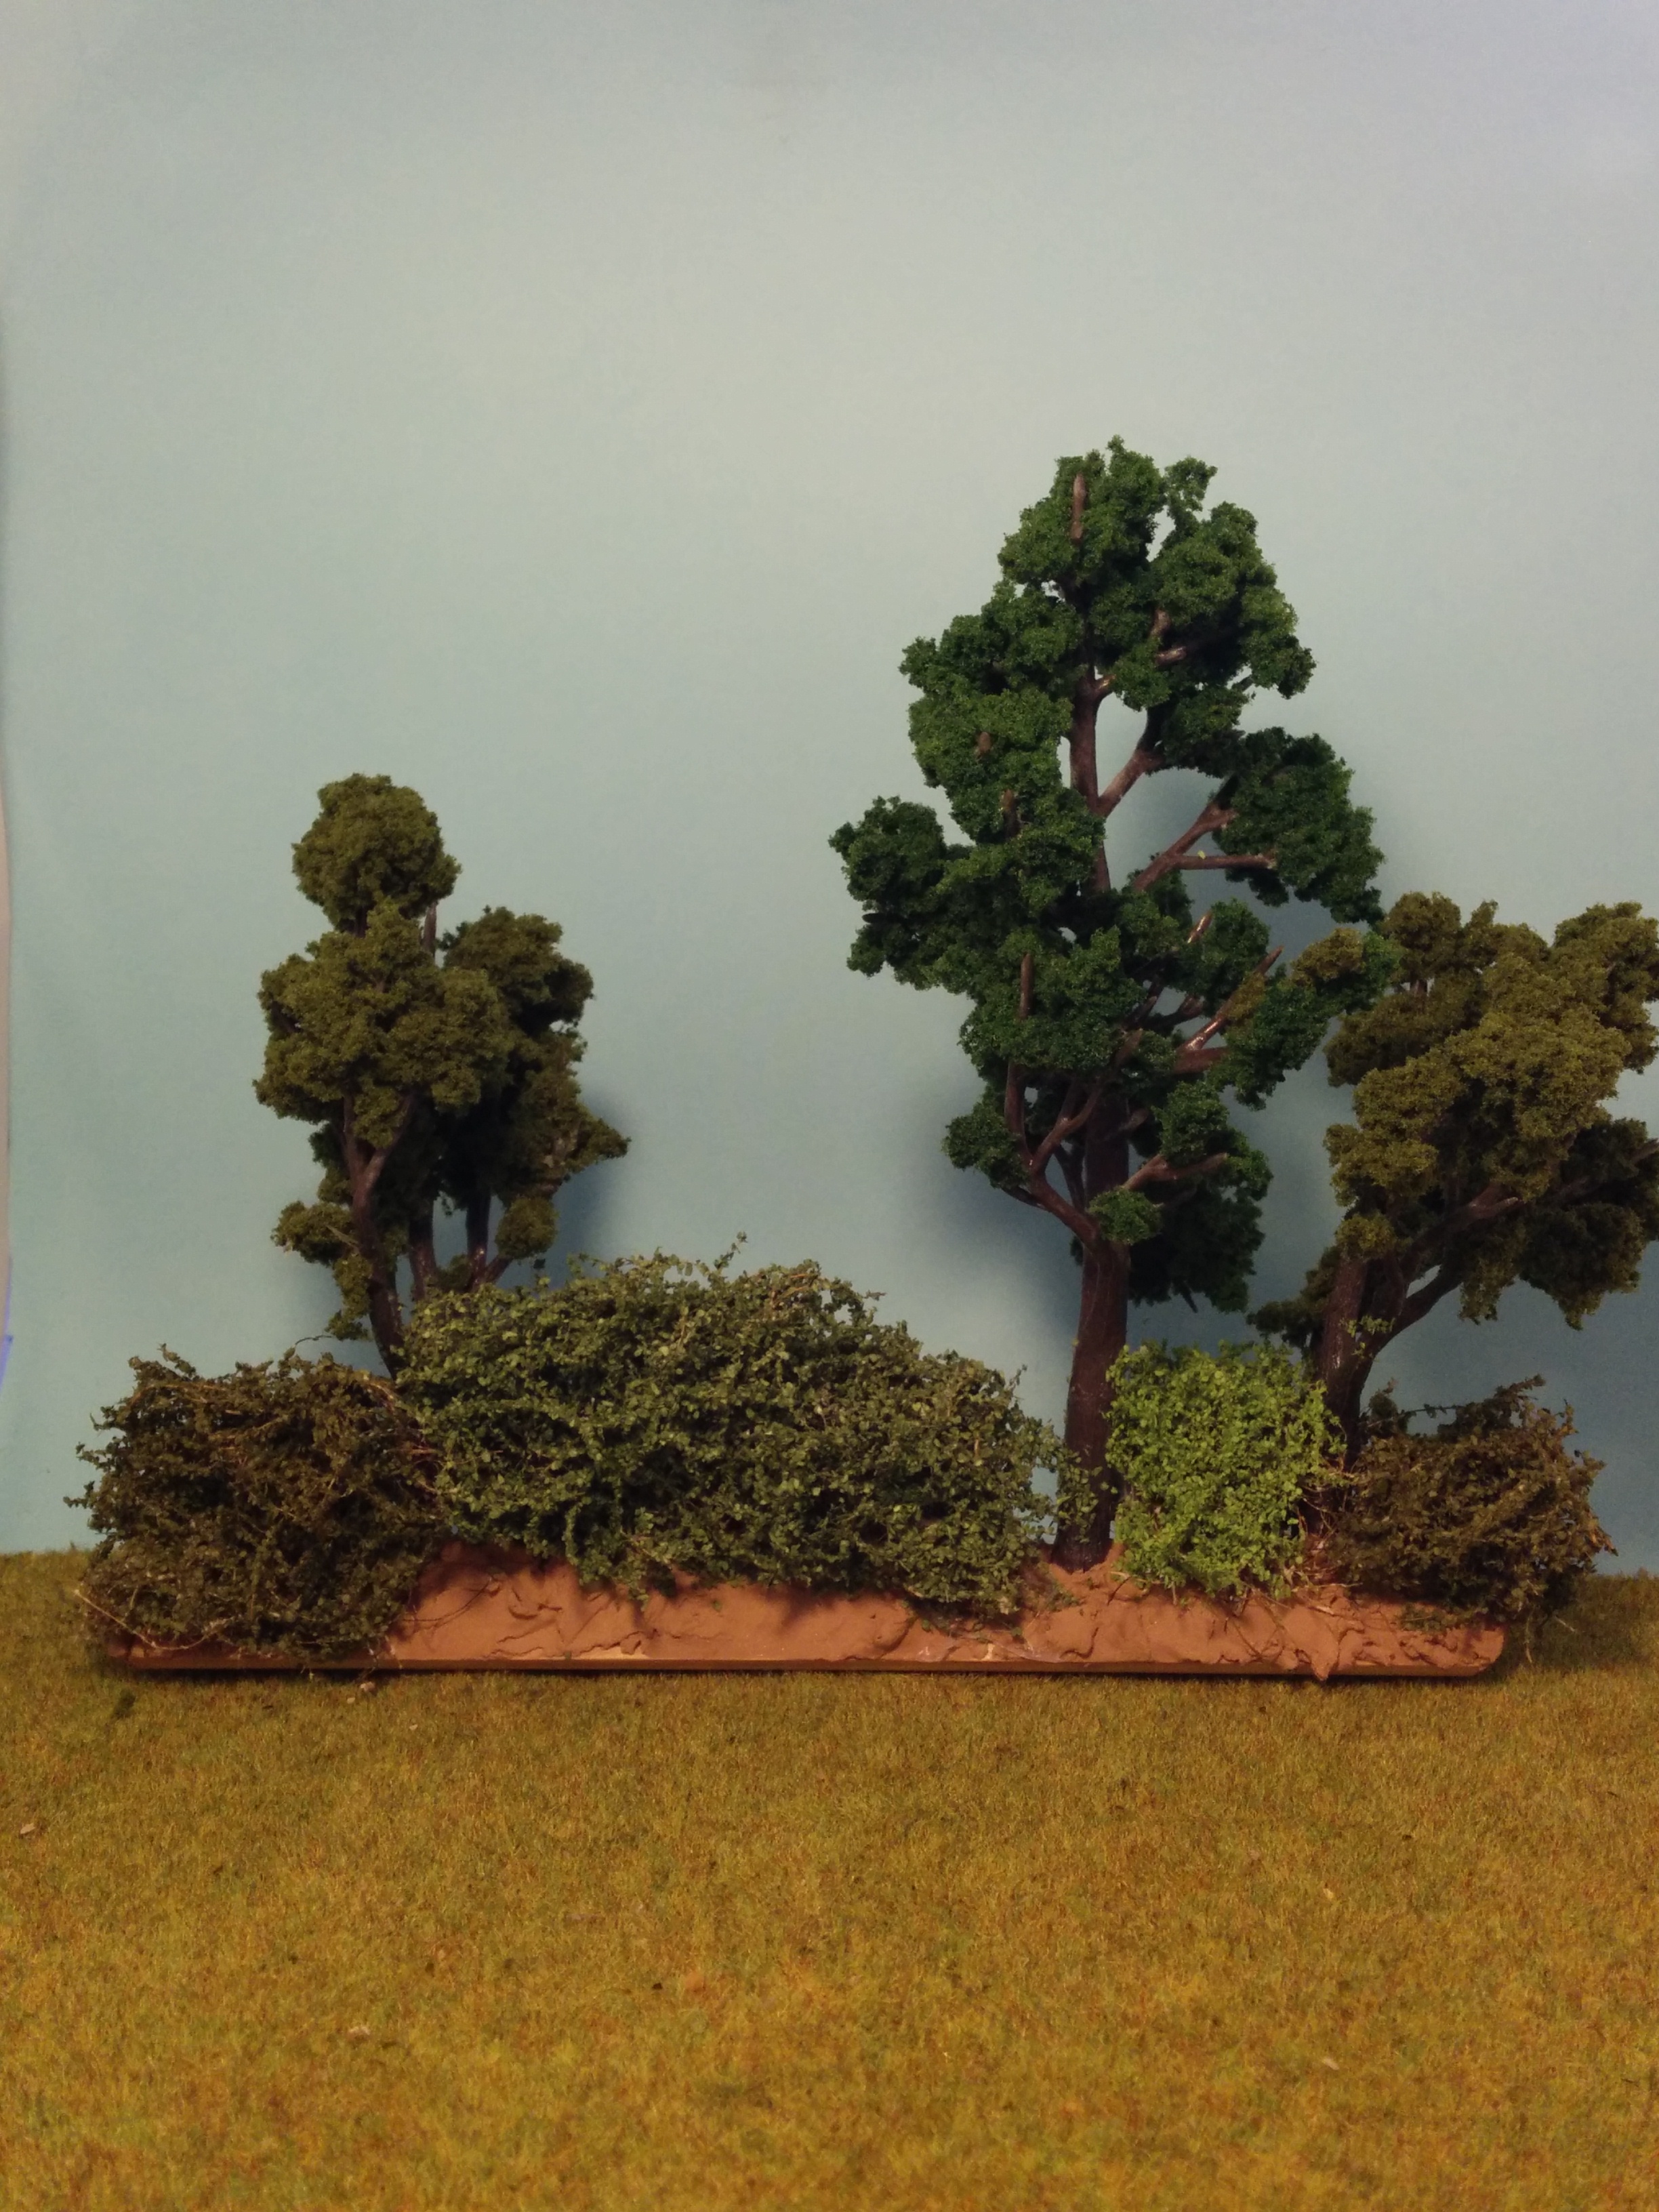
Next up is the reason I've been painting so slowly recently... bocage hedgerows. I've been making these for ages and I'd finally got to the stage of making the trees. Wow, that's a fiddly job. Woodland Scenics actual glue which they suggest for this purpose is rubbish. I tried a couple of "tacky glue" variants bought from hobbycraft and while they might glue glitter onto cards, foliage onto trees they don't.

In the end, copydex -- proper, gunky, smelling-of-fish copydex -- turned out to be the Right Approach.

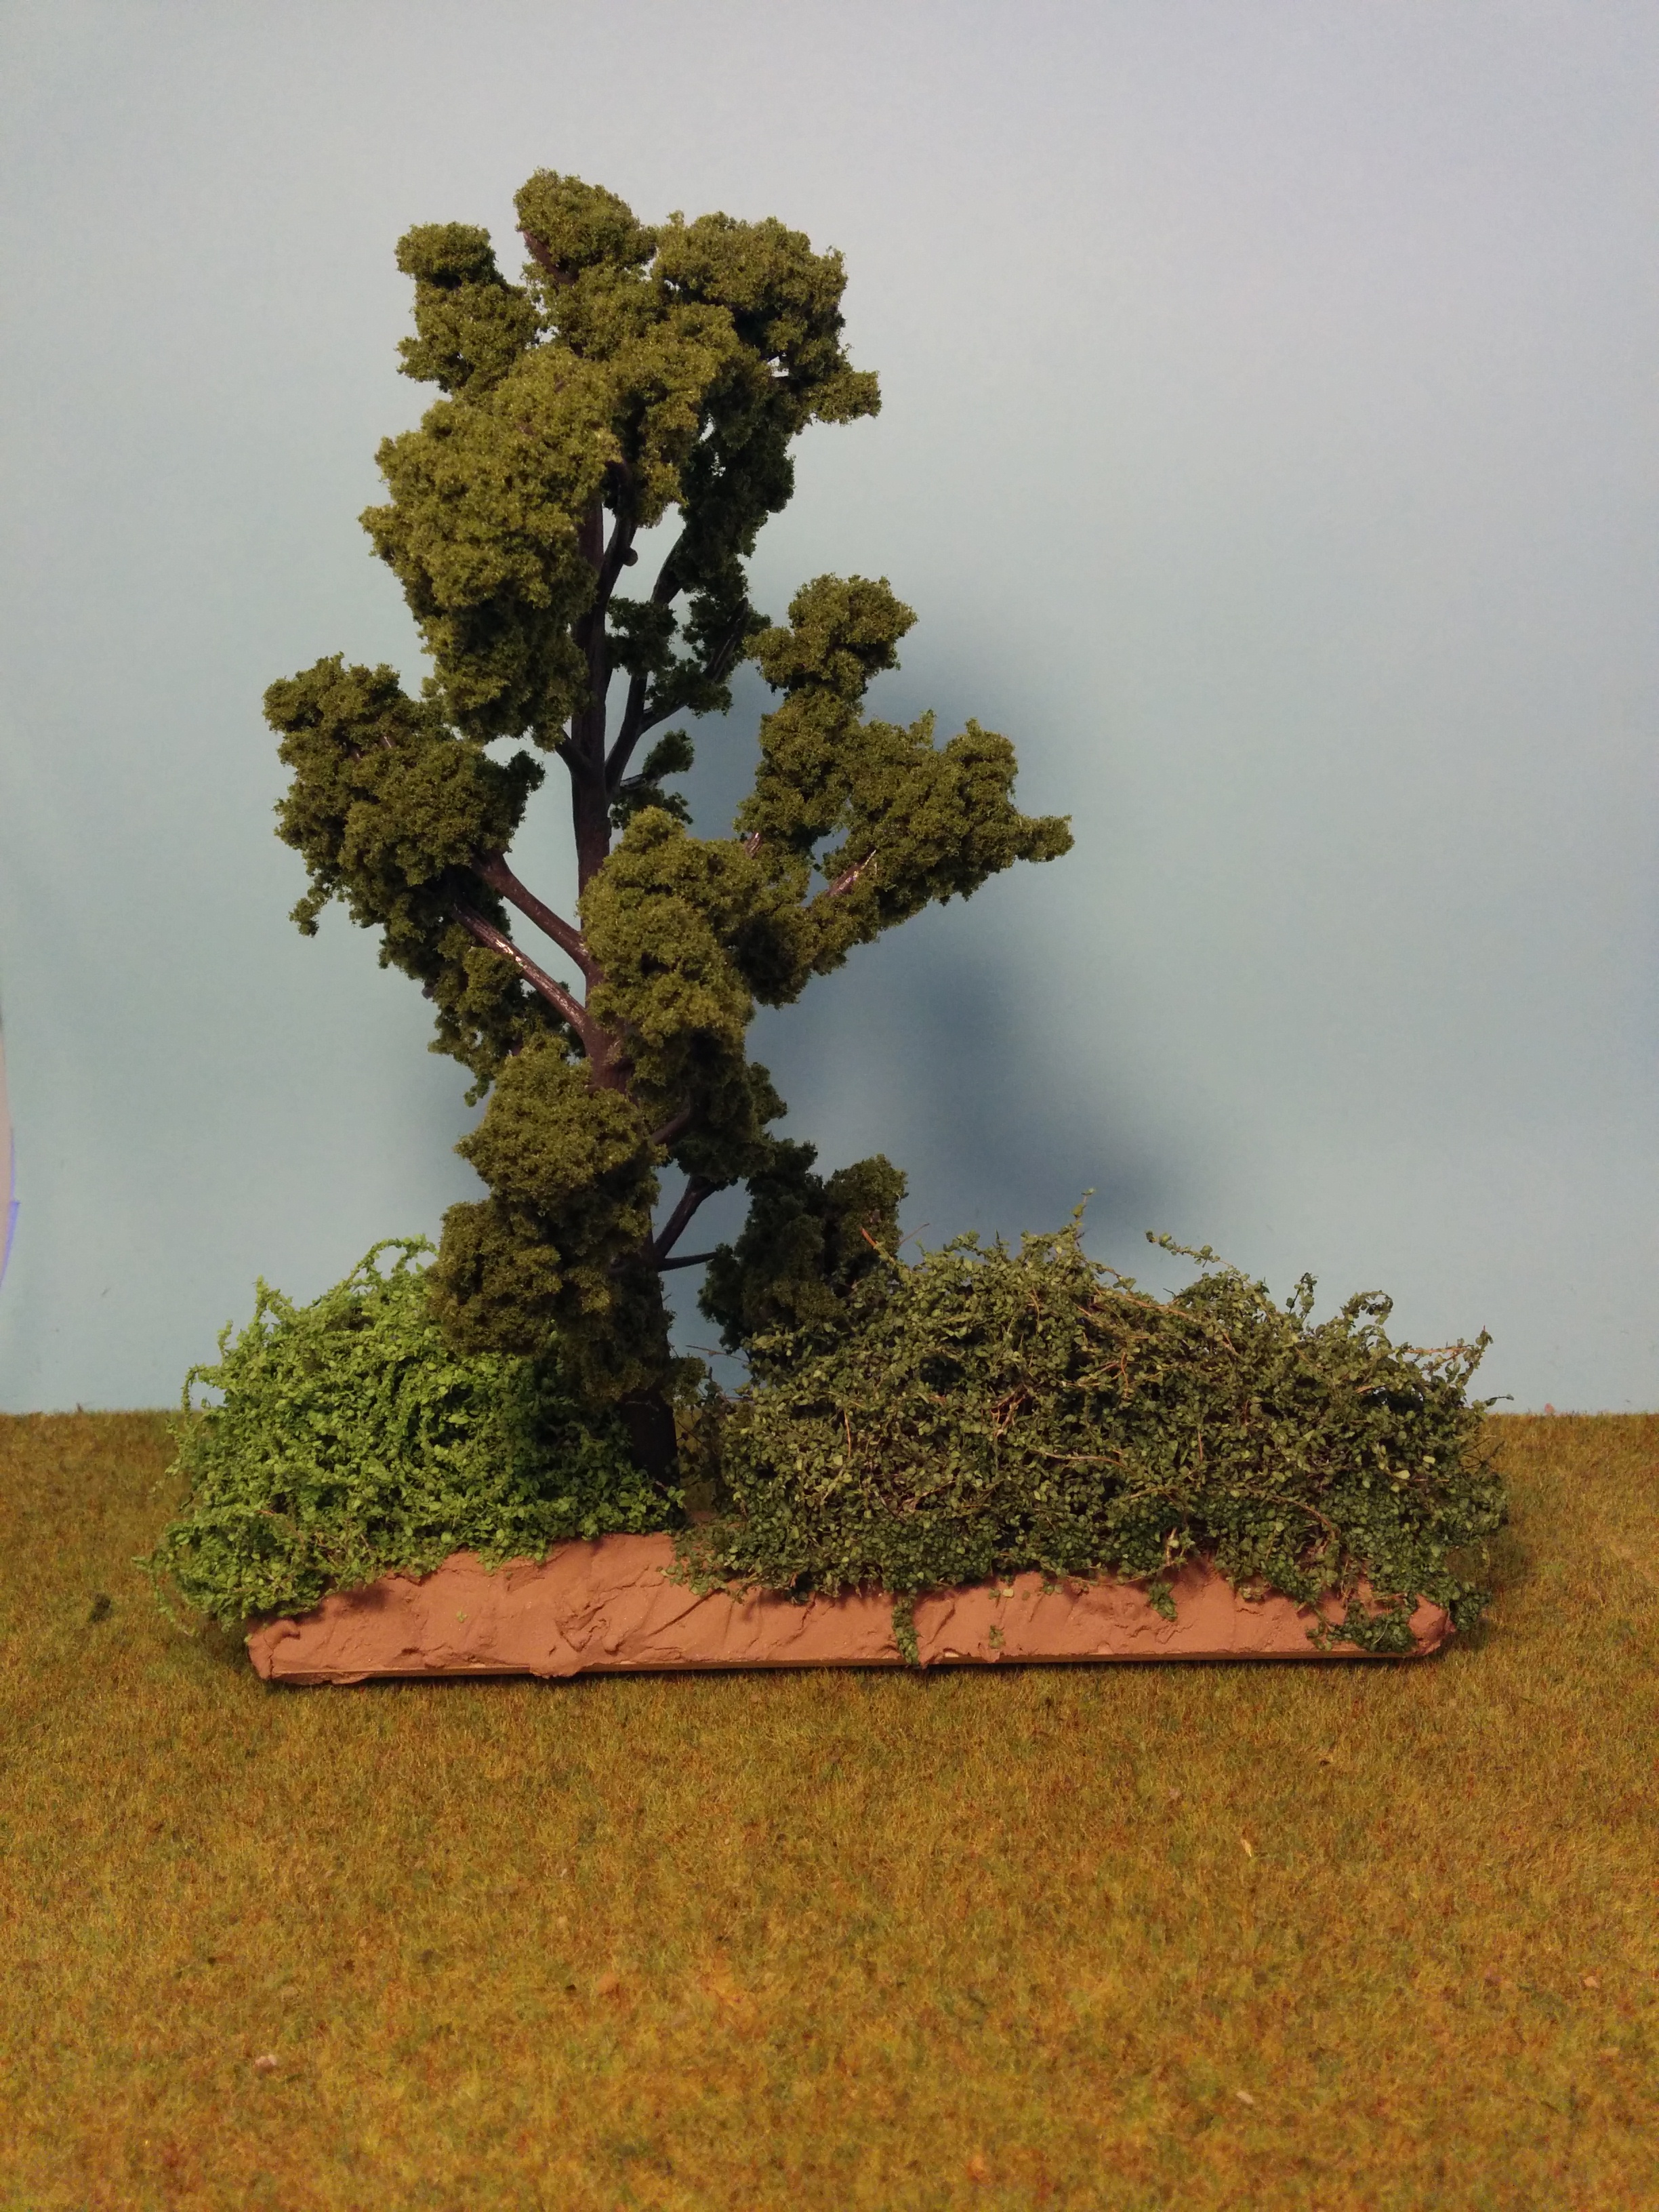
And patience. Doing a small area on each tree and then leaving them to dry means less of the "every time you add a clump another one falls off" frustration. The finished bits look like this;


The base is a length of wood moulding, triangular in cross-section. Over this, wood filler for the "mud". The bushes are loops of wire hot-glued onto the moulding. "Rubberised horsehair" (apparently it's mostly pig bristles these days) hotglued in sections onto the wire loops gives the underlying structure. They're finished by a layer of white glue and a scattering of Noch leaves.


Mostly these are about 11 inches long (to fit on a 12x12 field grid allowing for the corners), but some are shorter both to edge roads and also leave gate gaps. I've also done a set of lower hedges and some tree clusters.

Sunday, 25 May 2014

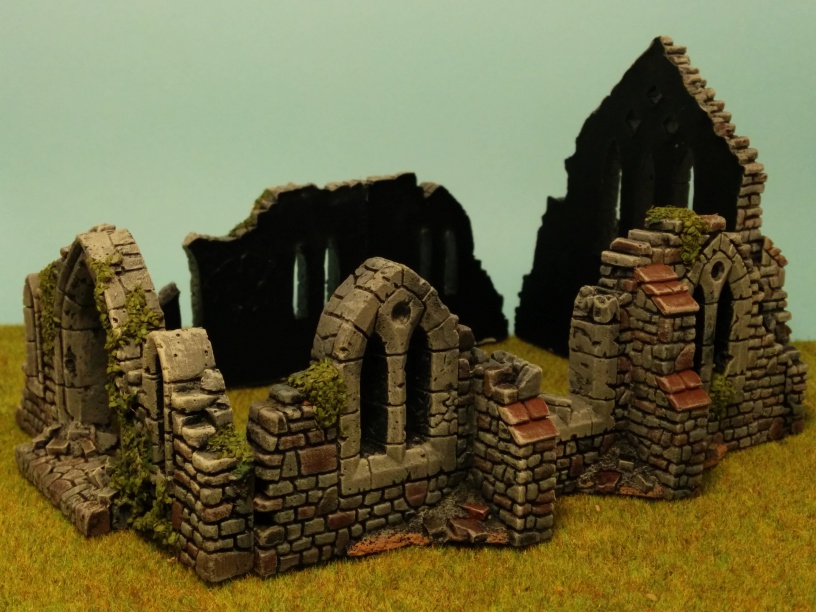
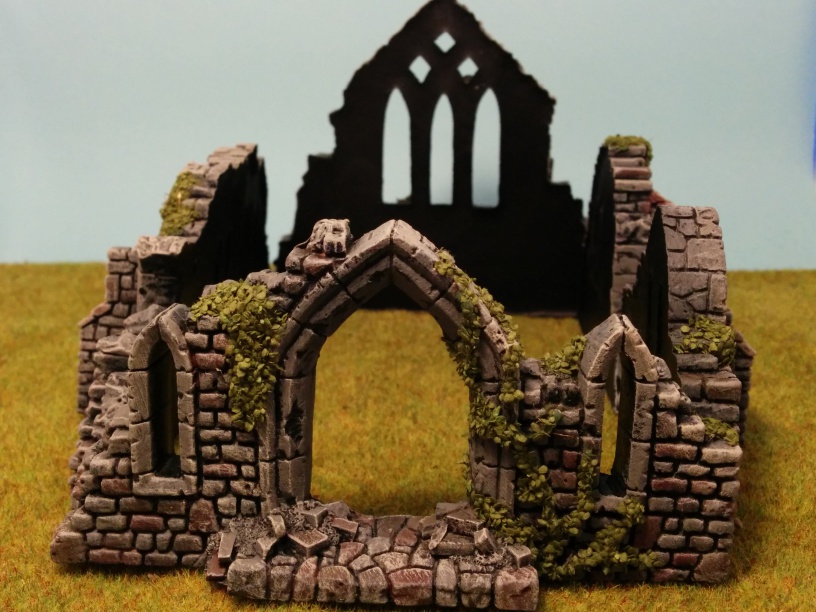
Ruined Cathedral


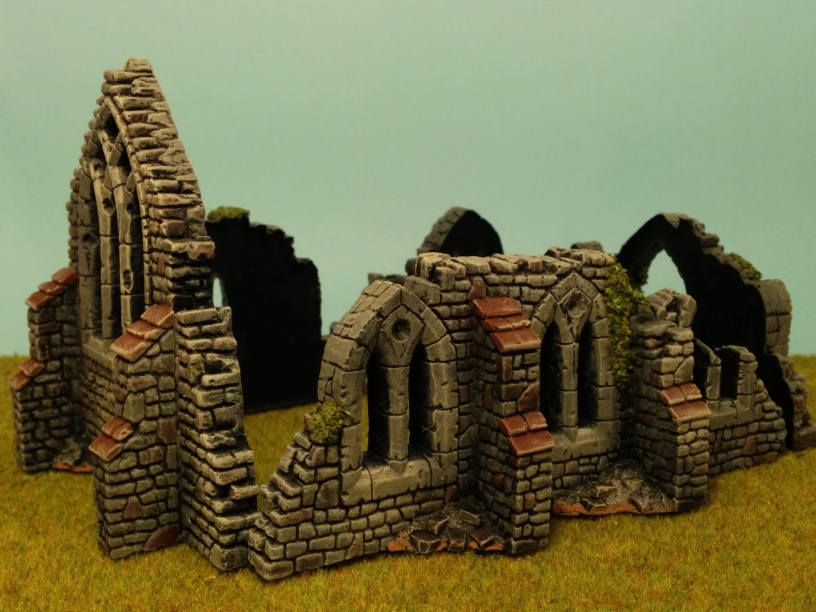
A little while back I was ordering a boardgame from Spirit and they do free shipping if you buy over a certain amount -- the game was annoyingly close so I was trying to think if there was anything to get at the same time and remembered that they stock Scotia-Grendel resin scenics. I've always liked the range, so I had a quick browse and found they had the ruined cathedral in stock.

So I got the free shipping and hence (effectively) a cheap cathedral ruin. It needed a little tidying up, but not much considering the model is so old; I guess it's been remoulded at some point. The six resin parts are supposed to assemble into an L shaped part, the doorway section and a long side. I decided not to connect the side to the window-end in order to aid with storing the parts.

On Friday I was working from home, so in gaps in coding while the enormously slow self-tests were running (we really need to invest in the cluster of systems that runs on. It's slow in the mornings, but in the afternoons when the US developers are using it as well it's glacial) I could get some painting done and brickwork is something that can easily be done in small bouts.

One side...
The parts had already been under-coated with black spraypaint. The brickwork gets a light drybrush in a mid grey. It's important that it's a chromatically neutral grey, because the next stage is to use various inks to tint the bricks in various colours. I use Ogryn Flesh and the three Army Painter shades.

The other side...
The inking produces not only bricks with subtle different colourations, but also will vary those colourations across the bricks; making them look more like natural stone. One can get similar effects by very lightly dry-brushing colours on, but it's harder to do that on a brick-by-brick basis. Once the inks have dried, I dry-brush everything with Howard Hues "Old Wood". It's a dusty off-white which is one of my favourite ways of getting a quick weathering effect on almost anything because it's colourless enough that the underlying tones won't be erased by it but just given depth. I don't actually find the HH range particularly good to paint with - I find they have terrible coverage despite being quick viscous. However, exactly those properties seem to make them excellent dry-brushing colours.

The doorway!
After that, the plant growth was picked out in a dark green Vallejo colour (I can't recall which one now) and coated in PVA glue and then Noch Olive Leaves provide the texture. These are excellent for plant growth; larger than normal ground-scatter, they're visibly individual leaves which make the plant portrayals more eyecatching when you want them to be a feature rather than part of the backdrop.

Quite a nice bit of terrain for what amounted to about a tenner (after the free postage!) and an afternoon's work.